Probably my top 3 go-to planes are a Veritas low angle smoother, a Stanley/Bailey #3, and a Krenov-sytle smoother.

The Veritas and the Stanley are easy to set for a consistent thickness shaving, but both are a pain to sharpen. The Veritas because the blade is wide and made of a particularly hard steel, the Stanley because the blade is thin (although it is a thicker replacement blade) and tends to rock on the stone if I am not careful. Frankly both of these sharpen better with a jig. The Krenov-style plane is very fussy to setup, but when done so correctly offers the thinest shavings, And it is much easier to sharpen.
Anyways since we all know you can never have too many planes, I thought it would be fun to try an English smoothing plane. So I picked up an old Norris from Patrick Leach, author of the famous plane treatise "Patrick's Blood and Gore".
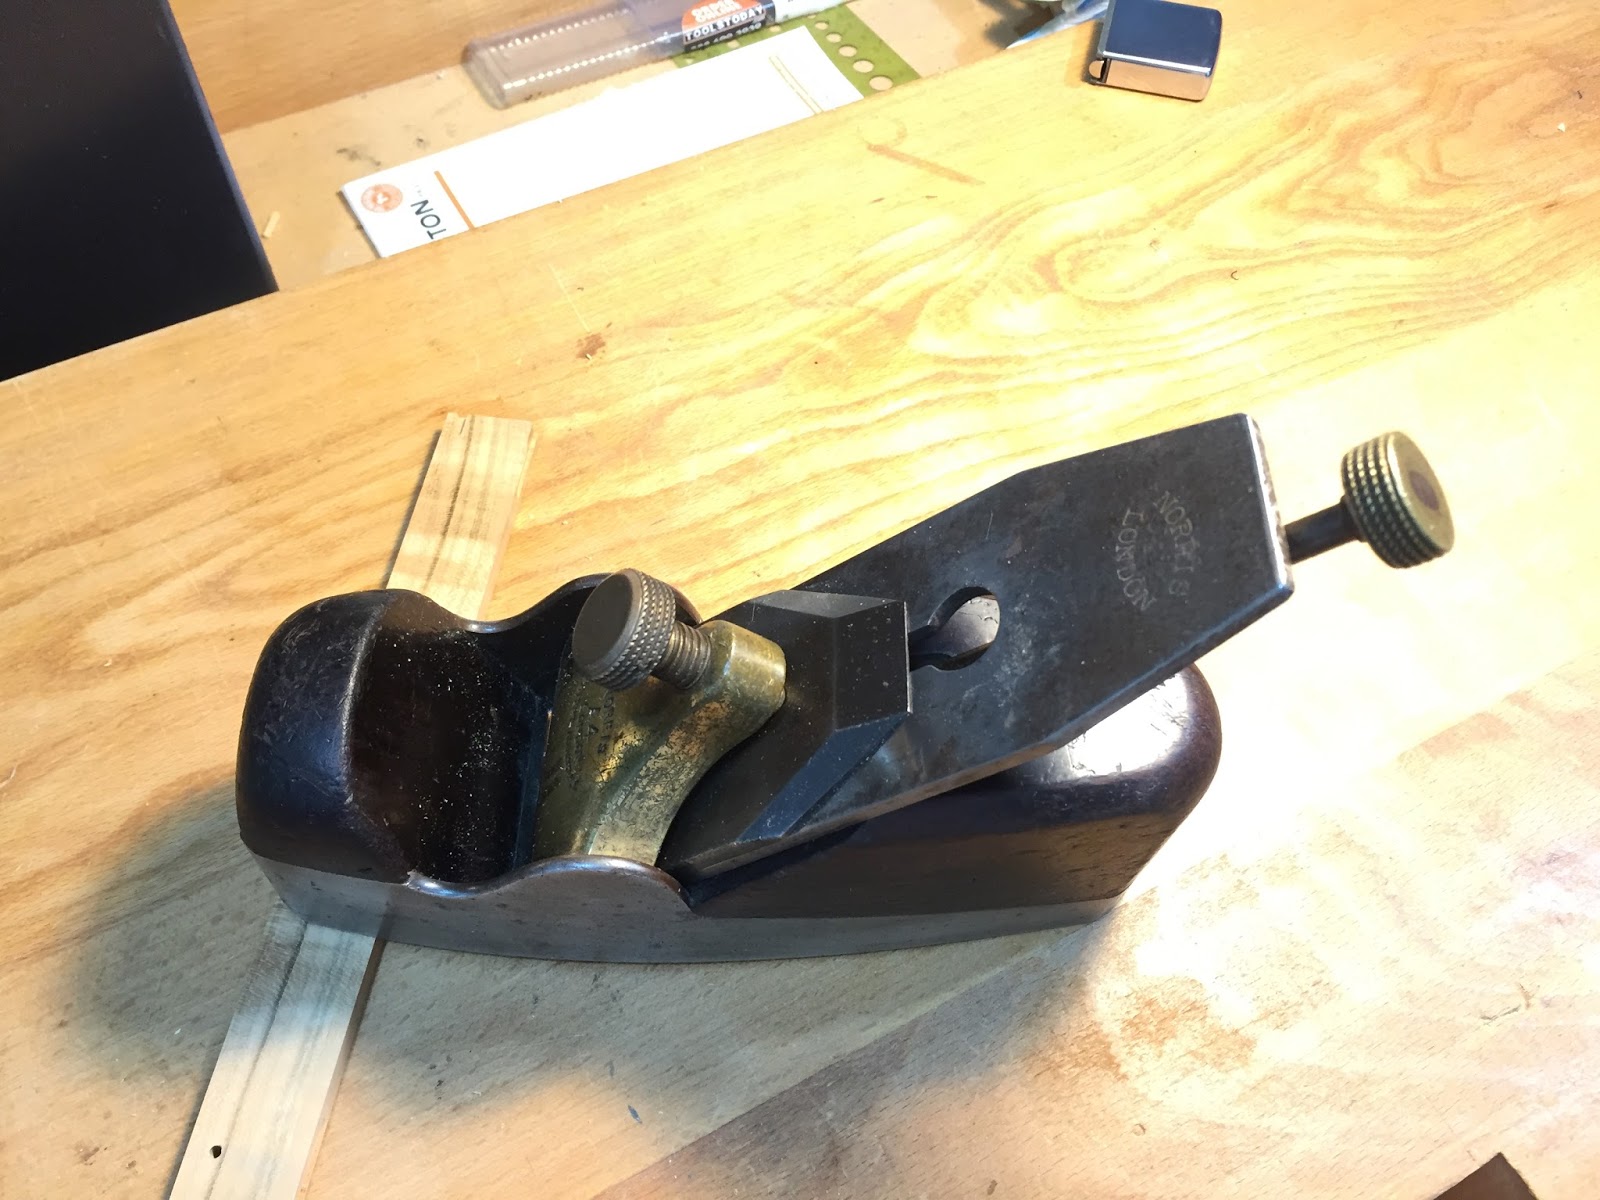
Although it is a bit shorter than the other planes, it is also has a 2 1/4" wide blade. Versus the 1 3/4" blade on the Stanley. It is also heavier by far than any of the other planes

Patrick claimed the Norris was a 'decent user' when he sold it to me, and it was as he described. The opening was tight, the blade had lots of life in it still, there were no cracks in the plane anywhere. It was well patinated, in fact it look like it had rolled around in a tool kit for a long time and was covered in tiny dents! But they were just superficial. A quick sharpening had it spitting out shavings, but the adjustment mechanism was pretty stiff, and it was apparent that the bottom of the plane was not flat.
So I decided to work on the flatness by scraping it with a carbide scraping tool, an old-school technique I learned 10+ years ago at a seminar down in Seattle. Most people (myself included) will use a piece of sandpaper on a flat surface, like a jointer's outfeed table, to flatten the bottom of a plane. This technique is fine, but scraping will provide a far more uniformly flat surface, to within a fraction of a thousanth of an inch.
In fact, the Stanley/Bailey was my first experiment in scraping, It was in really bad shape initially, so I took it with me to that scraping class just for a lark, and had good success in making in extremely flat.

Bottom of the Stanley plane's scrape marks
So I hoped to replicate that success on the Norris. In a nutshell, the process involves rolling out ink to a very thin layer on a granite surface plate, then setting down the plane on the surface plate. When the plane is lifted up, all the high spots will have ink on them and the low spots will not. Then, using a carbide tipped tool, all the inked spots are scraped off. The process is repeated as many times as required to get the surface flat. Since scraping only removes a tiny bit of material, it could take 50 or more passes to get the surface properly flat.
Here is the Norris part way through the process. I think the ink on the surface plate was too thick, it should have been more like a series of spots than a continuous area.

I worked on scraping it over two days and lost count of the number of passes I took. Because it is quite messy I was doing it outside. It finally started to rain on the second day so I had to call it done. It definitely cuts better than it did before being scraped, but is still not what I hoped. I think I need to give the blade a proper sharpening, and loosen up the adjustment mechanism before I pass judgment on it.
Hi Dan,
ReplyDeleteI'm commenting because there is a large ornamental plum log (22" x 58") that I saw at the Spanish Banks this evening (Mar. 28), and I'd love to make use of a couple of slabs. I don't have a chainsaw or a mill. You do, and I've read about your milling adventures at the SB log dump. I'd be interested in collaborating with you (financially, etc) on salvaging this log. I have pictures; email for more info. Also, I am a current student at the Inside Passage. Found your blog through links from other alumni. Have been following the blog for a few months now.
Regards,
Tim
timothy.andries@gmail.com
Download 16,000 Woodworking Plans & Projects .
ReplyDelete“woodworking pro weebly” (Google it)
Arbor Projects ,
Adirondack Chairs ,
Artwork Display ,
Bathroom Unit ,
Box Designs ,
Billiard/Pool Table ,
Barn Plans ,
Bed Plans ,
Bedside Cabinets ,
Bee Hive Plans ,
Bench Projects ,
Bird Feeders ,
Birdhouse Plans ,
Boat Plans ,
Book Case Plans ,
Baby Changing Table ,
Coat Rack ,
Cabin Plans ,
Cabinet Plans ,
Carport Plans ,
Cart Plans ,
Cat House Plans ,
CD/DVD Holder ,
Cellar Projects ,
Chair Plans ,
Chest Designs ,
Chicken Houses
Childrens Room Plans ,
Clock Plans ,
Coasters ,
Coffee Table Designs ,
Cold Frame Plans ,
Compost Bin ,
Computer Desk ,
Containers ,
Cradle Projects ,
Small Crafts ,
Cutting Board ,
Deck Plans ..