Sunday, December 27, 2015

2015 - It's a Wrap

Well a few more days left but pretty much done. Feels like I got more accomplished in December than I did in the whole rest of the year!

Dad's yellow cedar box is done, just need to glue it up. I foolishly cut the original lid too short and so had to make a new one. The new lid is crabapple from a tree that was growing in our backyard when I was growing up.


I've had some Krenov style planes on the backburner for ages. Left to right in the photo.


I fixed up a jatoba smoothing plane which was the first one I made, ten years ago. The wedge never really fit quite right and it made the plane quite difficult to adjust. Once I figured out that was the problem and tweaked the fit properly it was quite a revelation! Of course I am rather embarrassed to admit it took me that long to get it right . . .

I have a slightly narrower cocoblo smoother with wedge issues as well, still working on fixing that one. I also put an insert in the bed a few years ago. This one cuts really well but is also fussy to adjust.

Also added some thickness to an ekki jointer plane that was a few years old, it was never stiff enough previously as I had cut the sides a touch too thin.

Also decided to make a new jointer plane at the same time as I was repairing the other one, but this one has the mouth set a bit further back. Had a piece of wood labeled Jarrah lying around, but I am pretty sure it is some kind of mesquite or similar wood. There were three holes in the piece so I put some ebony inlay to cover them up. Also added some beech strips just for fun. And also because I cut the centre piece too thin! This one was just glued up last night and is yet to be dialed in.

The last one is a small plane made of I think ipe. This one worked great right from the get go!

My hope for the last few days of the year is to get all these planes dialed in and working perfectly.

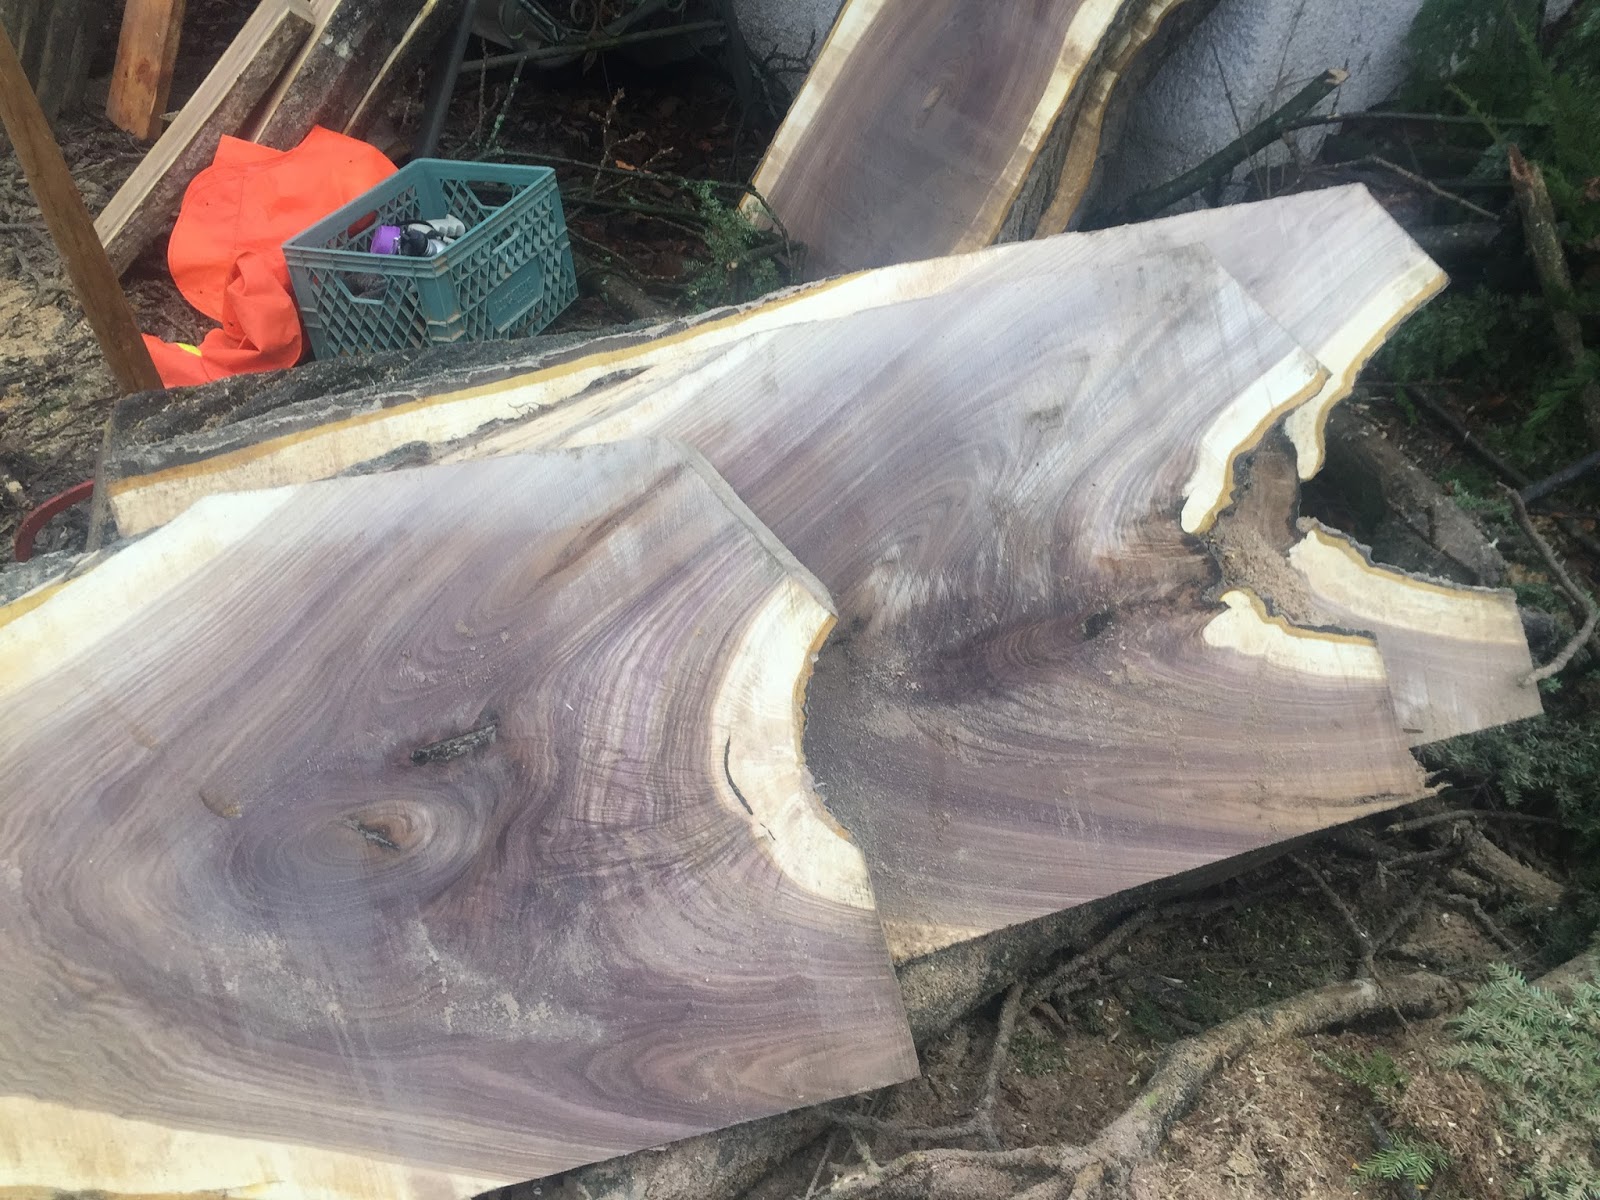
Looking ahead to 2016 I have decided to make a cherry slab table. I am drowning in cherry slabs so I am eyeing these four slabs which were all cut from the same flowering cherry tree. My son and I salvaged it from a lot in town in March 2008, so it is good and dry by now! I should be able to get two tabletops out of this, and I have an idea for the base that will hopefully showcase a bit of craftsmanship.
You can see very clearly the graft line at the top of the trunk, that is the right, on each piece, where the flowering stalks were grafted onto the regular trunk. I will definitely be using that in the table.

Finally, in 2016 I also hope to do a west coast native style bentwood box out of red or yellow cedar, or possibly even Monterey cypress.

Hoping for a productive 2016 in the shop!


Friday, December 18, 2015

Bowling

A friend of mine owns a very nice lathe and is an excellent turner. Him and I do a lot of chainsawing together, he uses the wood we salvage and turns magnificent bowls and platters and sushi trays and the like.

Sometimes though the wood is not so accommodating and during the turning various flaws are revealed. Previously he would reluctantly throw these bowls into the fireplace, rather than put his name of a piece of work he considered defective.

On a recent shop tour at his place, he gave me a bunch of these flawed bowls and said 'see if you can do anything with these'.  So I have been playing around with various patches to try and repair these flaws.

I quickly decided that there was no way to hide any repairs, so the best thing would be to try and turn them into a highlight, without conflicting with any interesting grain features the original bowl may have. 

This was the first one, a yellow cedar bowl with some sapwood on one edge. Unfortunately the sapwood contained some unsightly wormholes and dark staining. So I cut off the sapwood using my Hammond Glider tablesaw, keeping the cut parallel to the grain lines, and glued on a piece of red cedar with its grain aligned to that of the yellow cedar. Sorry no picture of the glued on red cedar.


Next up were a couple of maple crotch pieces with some interesting figure. The one on the right had a small crack right at the rim, which I was able to cut out with couple passes on the tablesaw. I then fitted a small piece of some kind of tropical red coloured wood into the cut. The other had an unattractive bark inclusion, which I removed by drilling out with a Forstner bit. I made a patch out of koa, which my friend then turned separately and fitted into the opening.


I did the Forstner bit trick on several other bowls. Holding the bowl securely is the key to preventing a misshapen hole, and drill in from the top so any tearout occurs on the back where it can be turned off more easily.


The one on the right I made up a maple burl and a koa patch.  My buddy can use either one, or make his own of course! The one on the left uses a triangular piece of that same red wood mentioned above. The triangular shaped cut out was substantially more challenging to get a tight fit with, as the faces of the two edges were not aligned well.

I cut off a big piece of this maple crotch bowl with wild grain. The patch is a light coloured cherry with  straight grain.
 This was a nice straight grain maple bowl. The grain was not perpendicular though, it was running through the bowl at 48 degrees. I cut the bowl and the cherry patch on the saw first, then trimmed them both on my jointer to 48 degrees.

This one is 'in process' still. My plan is to rip a one inch wide section out of the middle of the bowl. I have a nice piece of rift sawn brown oak that I will fit in. Unfortunately my saw is too small for the task, I will be borrowing a friend's saw in the new year to do this.

Kind of a fun change from my usual activities, and it is nice to have finished half a dozen in just a few days. I think that more than triples my 'projects finished this year' list!

Friday, December 11, 2015

Table Finished!


It all came together fairly quickly at the end. The top had cupped a tiny bit, so some judicious trimming of the support structure was required.

Also, the buttons I made to allow for expansion/contraction in the top piece had the grain aligned incorrectly. So I had to make some new ones. Not a big deal, but kind of embarrassing and I am glad I caught it in time. First buttons were of apricot shown on top, second buttons were of cherry below. You can see the grain lines run at 90 degrees between the two.

Have also made some good progress on the box for my father's ashes. Bad planning on my part was that I made the dovetails a bit too small to be able to work them readily with my chisels. So it required a lot of fussing, and they turned out OK but not great. The old growth yellow cedar was surprisingly susceptible to chipping. Still have to put in some grooves for the top and bottom, then glue it all up. Close to done. Hope to have a little family ceremony in the late spring, so still lots of time.

Got out for the first milling of the autumn season. Initially thought it was walnut, but subsequent investigation shows it is most likely butternut. Not quite as colourful nor as dense as walnut, but still a nice wood on its own. Mostly shorter chunks in the 3-4 foot long range. Over two days we milled probably 30 slabs, including several quite nice crotch pieces with some nice figure. On a private lot in New Westminster, another local bungalow going down for a McMansion.


Also got out to the beach with a friend to do some 'clean up' on some slabs I had milled in years past. My storage area is now so full that I can't really afford to store any slabs that are less than perfect. So we hauled a bunch back to the beach and cut them up and saved just the good sections. It was a really really nice day, but a bit frosty!

Monday, November 30, 2015

Table Update

Stunning progress to report on the oak slab table. It looks like it will possibly be finished in the next few days! It has been quite a while since I actually finished a project, so I am quite looking forward to it!

I completed the mortise and tenon joinery fairly quickly, the fit came together surprisingly well. The error I made in cutting the mortises a bit too long turned out to not be a big deal, a 1/4" dowel will fill the extra space without showing.

First photo shows the table test assembled, no glue, no finish, and the legs have not been relieved yet. Could not resist throwing it together to see how it looked and fitted!


Detail of one corner. A very acceptable fit. The slightly brown tone of the skirt clashes with the slightly red tone of the leg, but the difference is barely noticeable later on with the finish applied.

Four coats of the Enduro Var urthane finish applied. I was more diligent about sanding between coats and that really helped with the smoothness of the finish. 

There is a slight taper applied to the inside faces of the legs, it's not so obvious in the photo above but it does help to lighten the underside of the table up a bit. The slab is not very thick, just over one inch, so it is better that the legs and skirt be a bit lighter.

Saturday, November 21, 2015

Benched!

Finally getting back to some work in the shop, although I have also been spending some time in the wood vault cleaning up some of my slabs and cutting the crappy sections out of others in an effort to free up storage space. Storage space for more slabs of course!

I have decided to focus on finishing up a bench made of oak that I started ages ago. I have a couple other projects that are also partially done, but this is one that I think I can complete  relatively quickly (for me!). I intend to use it to replace my chair while I am sitting at my desk, I want to be able to kneel on it while I am typing/surfing/etc. I am hoping it will improve my flexibility and alleviate some related symptoms.

The top is a slab that I finished with several coats of Enduro Var water based finish months and months ago. It was pretty easy to apply and also not stinky at all. It darkened the wood a bit which was not too serious, but the foam brush which was the recommended application method left small ridges. They are quite small, probably not noticeable by anyone but me, but will  have to be resolved before I apply it to the legs and skirt.

I had also cut out the material for the legs and the skirts ages ago. I took care to cut out the legs such that I have all four sides with vertical rift sawn grain. I think they turned out quite well.

For the skirts I wanted to use some oak that had a bolder grain pattern. Unfortunately one of the longer pieces warped quite badly when I cut it out of a larger blank. I really liked the grain so I was loath to discard it.

I sat on that problem for months, and finally decided to resaw the piece into a couple of veneers and glue them to a nice straight piece of mahogany. That actually seemed to work pretty well, although my gluing and clamping techniques could stand a bit of improvement!

Here is a rough idea of what the table will look like upside down.

Side note -The oak for the skirts was from a tree a couple miles from my house. It was on a boulevard in front of a 1950s-ish 3 story walk up apartment building which were once common here in Vancouver. The tree had been blown over in a storm and the city crew had left a nice piece of the trunk there after cutting up the branches for firewood. It was one of the rare logs that I milled on the street rather than at the log dump our in the sticks somewhere. It took me several hours and as I was almost done a guy in a tatty white Jaguar who looked like a pimp with a very suspect looking woman in the passenger seat stopped and proceeded to harangue me for chainsawing in front of his suite for more or less the whole morning. Despite his scruffy demeanor, I felt he was probably correct so I have avoided milling in front of houses/apartments since that time. I did get some beautiful slabs from that log, but unfortunately they cracked terribly as they dried and I was left with just a few bolts of usable material. That is another reason I was so keen to save the little bit of the material I did have. It's nice to mill your own wood, you get lots of stories to go along with it!

Next I mortised the four legs freehand on my horizontal mortiser. I am starting to think that a nice X-Y table might be a good addition to the shop. I find freehand milling just a bit too grabby and hence stressful for my liking.

Next will be to finish the tenons and then I may do a bit of shaping on the legs just so the thing doesn't look so darn 'blocky'.


In the setback department, in addition to the warped piece mentioned above, I have discovered that I cut all the mortises a bit long. As I have already roughed out the tenons, I will not be able to compensate by lengthening them, so I have decided to plug the tenons at one end. Fortunately the amount is fairly small and 1/4" dowels look like they will do the trick. Just pure carelessness on my part, dropped my concentration for a moment and BOOM!

Saturday, November 14, 2015

Copenhagen?

Found myself with a free day in Copenhagen earlier in the week, so it seemed like a good idea to go check out the Design Museum which holds a bunch of mid century modern Danish furniture.

As I approached the museum it looked promising, there were a number of furniture and art/antique shops.


As I arrived at the museum I discovered that, being Europe, it was not open until 11 AM. So I had to go hang out in a nearby coffee shop for a while, not a particularly tough task!

At 11 into the museum it was, after battling my way past a large gaggle of elderly Danish ladies at the entrance who all had to pay individually using small denomination coins fished from the very very bottom of their purses.

Some stuff to see, not as much as I had hoped, and it was a bit chair heavy for me.


I really liked the display cases they were using to showcase some of their ceramics collection!


Friday, October 23, 2015

Puttering

Well the much anticipated bonanza of logs resulting from the late summer storm described in my last post has failed to materialize. In fact there is nothing but crap at the log dump right now.

Meanwhile I have been keeping myself busy with odds and ends, including running a few cherry slabs through my 24" planer.


This one still needs a few more passes to finish it. You can see that it developed quite a twist as it dried. Luckily it is quite thick so I can afford to take more off the top. It is glued onto a torsion box to provide a flat surface to ride on the planer table. Once this side is done I'll pop it off the box and run the other side through like normal.

The amount of shavings that get generated is quite large. I have only a standard metal garbage can under my cyclone, it can get full on a single pass from a slab like this! Really crimps the productivity to have to stop and empty the shavings after each pass!

Thursday, September 17, 2015

Contemplating the End of Summer and Elm

Late Summer Storm


Well summer went out with a bang. Two months of scorching heat and water shortage, followed by one of the biggest storms in recent history (maybe the 2006 flattening of Stanley Park was bigger) which resulted in power lost to 525,000 customers of BC Hydro. Since the population of Metro Vancouver is around 2.5 million, and the number of households and businesses (ie customers) is less than that, it seems that power was out to a substantial percentage of town!

From a tree perspective, near where I live there was a huge oak tree down completely blocking a four lane street.


My woodturning buddy scored a bunch of ash (one of the few common trees in Vancouver that I have never milled), plus there was a walnut tree down nearby as well. In the news there were trees down all over town.

We will see how much of this 'windfall' shows up at the log dump over the next while. It could be a good season for milling!

I plan to get back to the shop in the next few weeks, so this will likely be the last wood contemplation.

Elm


When I first started woodworking I never expected to be able to work with elm. Similar to chestnut, I figured it had gone the way of the dodo, in this case thanks to Dutch elm disease.

It turns out however that elm is a rather common street tree around town. There are American elms, along with other varieties such as Chinese, Dutch, Siberian, etc. Several get quite impressively large. It is the American elm that is vulnerable to Dutch elm disease, but the virus does not seem to exist out here, permitting elms to grow unabated here.

Unfortunately by the time an elm log shows up at the log dump, the leaves and branches are long gone and I have no way to identify which variety of elm it is. Some of them sure smell bad though!


I have two favourite stories of elm milling. The first is a large elm log with a crotch at one end that was down at the log dump several years ago. It was too big for my usual 36" bar so I had to use my 60" bar on it. A friend and I peeled a few slabs off of it, but it was a ton of work and the slabs were super heavy, so we left it half-milled. A few days later another friend called and asked if I could take off another slab for a friend of his to use in her garden as a bench. So I trundled down to the beach one chilly winter's day with a dusting of snow, by myself this time, with the 60" mill I can barely lift on my own, never mind push on my own. Milling one more thick slab off that log almost killed me, so I call the wood that came from it 'death elm'. I didn't even bother trying to move it, I just called my friend and told him to come get it!

Another funny elm slab story concerns a really nice slab I had drying in my wood pile some years ago. My wood pile which is frequently home to rats. Apparently one of the rat traps I set out in the woodpile caught a rat, and it sat there for a while before I discovered it. The rat had decomposed and left quite a stain on one of the nice slabs of elm. Eventually another friend took that slab and made it into a wedding gift table for his friends. Apparently the stain is on the underside of the table, and the groom was told the story of where it came from, but not the bride!

Some of the nicest, straight grained clear hardwood slabs I have ever milled were elm. This was a big one on private property that a friend and I milled some years ago. It was too wide for my 36" bar, we had to trim it down to fit it through the mill.


This slab may have come from the above log. 8 feet long, beautiful straight grain, probably 2 1/2" thick. A gorgeous piece.

Here are some shorter boards, but impressively wide. This particular one I had to flatten with a router jig as it was too wide for my 24" planer. Nice clear grain on it.

Elm can also be spalted, although that is rarer. It definitely seems to take a lot of the darker tones out.

Close up of some spalted elm. Very lovely.

This was a piece of an elm crotch that I flattened with a router jig. An interesting piece but I struggled to find something to use it in. Still awaiting the perfect use to come along for it!

A couple of good sized slabs, just home from being milled up.


Saturday, July 4, 2015

Contemplating Cherry

Cherry logs have started turning up at the log dump in droves over the past few years. Some are diseased, but others are in beautiful condition.

A piece of local cherry was actually the first wood that I 'rescued', probably 15 years ago now. My dad had some cherry in his firewood pile, they had come from a street tree near where I had grown up. I grabbed a few of the best ones and cleaned them up. I still have some of it. Here it is on the back of a cabinet I made for my sister a couple years ago. If you look closely you can see that there are black streaks between some of the growth rings. This is not uncommon in the local cherry and is definitely a bit of a downside. I don't know what causes it, but luckily not all trees have it.


The cherry street trees in Vancouver are not the well-known black cherry of eastern Canada and the US, or commercial cherries grown for fruit. Rather they are are almost entirely cultivars of Prunus serrulata, Japanese flowering cherries, grown for their outstanding blossoms.

According to the Vancouver Cherry Blossom Festival website: "By the time the Park Board completed its first comprehensive street tree inventory in 1990, nearly 36 percent of the 89,000 trees on city streets were represented by trees of the Prunus genus—the flowering plum and cherry trees. Of the 479 different classifications of trees identified in the inventory, the most common species was Prunus serrulata ‘Kwanzan’, the Kwanzan flowering cherry. (12.6 percent)" 479 different types of cherry/plum trees growing in town? Wow!

Here is a photo of a Kwanzan tree in full bloom not far from my house. Beautiful!


Another interesting fact about the local cherry trees is that they are all grafted. The flowering named cultivar is grafted onto a trunk of a more robust cherry variety. I have been unable to identify the name of the variety commonly used for the trunk, although my dad, who grew up in Vancouver in the 30's, told me that there was a tree near Stanley Park from which the branches were taken to make the trunks. Don't know if that's true or not but there you have it!

I do know that the trunk wood is quite consistent across the many cherry logs I have milled, so I can believe that there was a common source for them. It has a milder look to it than black cherry, I have heard that it is more like European cherry wood.

So the graft union between the flowering branches and the trunk often creates some interesting patterns. Here is a photo of one with particularly strong contrast between the two woods. The flowering wood is on top and is much more colourful than the trunk wood below.


This was a complete small tree that my son and I rescued after a homeowner cut it down. We put it in our van just as another person pulled up who wanted it for firewood! He was not happy but we got some interesting slabs out of it. The graft line is visible, but the contrast between the two types of wood is not much.  You will note that the majority of the cherry I have is made up of the unknown trunk wood variety rather than the flowering branch wood.

Some of these local trees get quite large. This one is 3 feet across. They grow fast as they get plenty of water and they are spaced far enough apart that they do not have to compete for sunlight. The growth rings can be a bit coarse though.

Here's one that is a bit more gnarly.


And in contrast here are some nice thick clear slabs without any graft line. Sorry about the edge view!

My friend who is a woodturner often comes out and mills with me. He loves using these wide thick cherry slabs for large platters. He says they make his shop smell like cherry pie when he is turning them!

This is how these logs look before milling up. They are sometimes only three feet long, a six footer would be a long one.

Fresh off the saw they often display an orange tint.

Drying-wise I find cherry a bit fussy. I will leave it outside under cover to dry for two years (or at least two summers which is when most of the drying gets done in this part of the world), then put it in my dehumidifying kiln to squeeze out the last couple percent of moisture. My rule of thumb for cherry is that if it is milled too thin the slabs will warp like crazy, and if they are milled too thick they will crack! Slabs flat cut from the outside of the log will warp much more than slabs cut rift or quarter.

Some of the quartersawn grain can be stunning.