Monday, March 30, 2015

Plane Underway and Other Ramblings

Well after my last post lamenting my unhappiness at my jointer plane and stating that I was thinking of gluing some 'extensions' on the side to give it a bit more heft,  my friend Bill dropped me a note and asked if I needed a piece of lignum to glue on the bottom to see if that would help. Wow!

Then I was talking to another friend about the best length for a jointer plane and he suggested I drop by his studio to check out his two jointer planes. A few days later I did visit him and he gifted me a beautiful clean chunk of Macassar Ebony to make a new jointer plane with. Wow again!

Meanwhile I had also been toying with a piece of jarrah that I had also received from Bill, a few years ago. It was a long piece that was reclaimed, and also had some cracks, but I was able to cut out a 16" clear section from it. It was a bear to plane, the grain was a bit wild, and I wound up having to scrape it smooth.

So now I have the possibility of three jointer planes: Jarrah on the left, Macassar ebony middle, and my existing plane made of ekki.


Working these woods right away I notice how hard they are, and tough to plane cleanly. The Janka hardness of the jarrah is 1910, while the Macassar ebony is 3220, and the Ekki 3550. Jarrah is noted as a wood that is hard to work due to interlocking grain, the Macassar is quite a bit harder still, and also has some interlocking grain. Surprisingly, at least for me, the ekki which is the hardest of the three seems to plane the most cleanly. I still need to do a bit of cleanup on the Macassar, then I will cut the sides out of it.

I also decided that it was time to start on a project that I have needed to do for a while, but wanted to wait until I had no other projects on the go at the same time, like the shoji lamp, to distract me. My father passed away in October of 2013 and I told my sister that I would make a box for his ashes before we took them to the cemetery. So it is time for me to get that done and to put dad to rest.

I have a design in mind, and plan to use yellow cedar for the main part of the box and cherry for the lid. Dad was a handy kind of guy and worked occasionally with yellow cedar. I remember going into his workshop as a child and him expounding on how wonderful the yellow cedar smell was. So I think he would like that choice. And the cherry is from a street tree near our house when I was growing up, the tree was cut down around 2000 and dad salvaged some chunks from it. He had them in his firewood bin and I grabbed a few of the larger ones a few years later.

Here I've resawn from one chunk a couple small pieces that I plan to use as the lid.


And not to forget that I have been out milling a couple times recently too. Bill and I were out a couple weeks ago and got a nice Port Orford cedar log. Half the slabs we took were a bit knotty, but the other half, about 5 slabs probably, were gorgeous.

Then last week I was out again and picked up some quilted maple. Also milled up some horse chestnut that had some gorgeous colours in it that same day, although I did not take any myself.

Thursday, March 26, 2015

Cracked!

After I finished the 2 year lamp project I took a few days to clean up the shop. I decided to take care of a few things around the house and do some easy shop-py kind of stuff to help me wind down a bit after the lamp.

So first up was to install the dust hood I picked up in January for my General planer. I had previously cobbled something up out of a metal heating duct, some thin plywood and, naturally, duct tape. It looked like total crappy hillbilly engineering, but connected up to a 6" dust collection system it worked a charm.

This unit is a replica of fibreglass and is artisinal made in small batches in Canada specifically to fit the General, but only has a 3.5" connection on  it. Anyways I went ahead and drilled and tapped some holes in the cast iron top of the planer, and attached it with a couple hinges. Still seems to work fine despite the reduction from 6" to 3.5". And it looks a whole lot better painted green to match the planer!

I had come to realize in the past while that I had never been happy with my long jointer plane. It's a Krenov-style plane about 16" long that I made a few years ago but had not used much until recently. The primary issue with it is that side pieces are not thick enough, allowing the plane to flex while in use and also making it quite difficult to get the bottom flat.

On a recent trip down to Seattle I stopped at Woodcraft and grabbed a promising looking blank out of the bin in front of their store, cost me $25 or so I think. After I got it home I stripped the wax off it and ran it through the joiner and the planer (with the exciting new dust hood!) to clean it up. And BAM! Crack City!
The wax it was coated in was quite opaque so it was not possible to see these cracks before I bought it. Disappointing!

I do have a couple other blanks that might work, but what I think I will try next is to glue matching side pieces onto my existing plane to try and stiffen it up.


Monday, March 16, 2015

FINISHED!!!!!

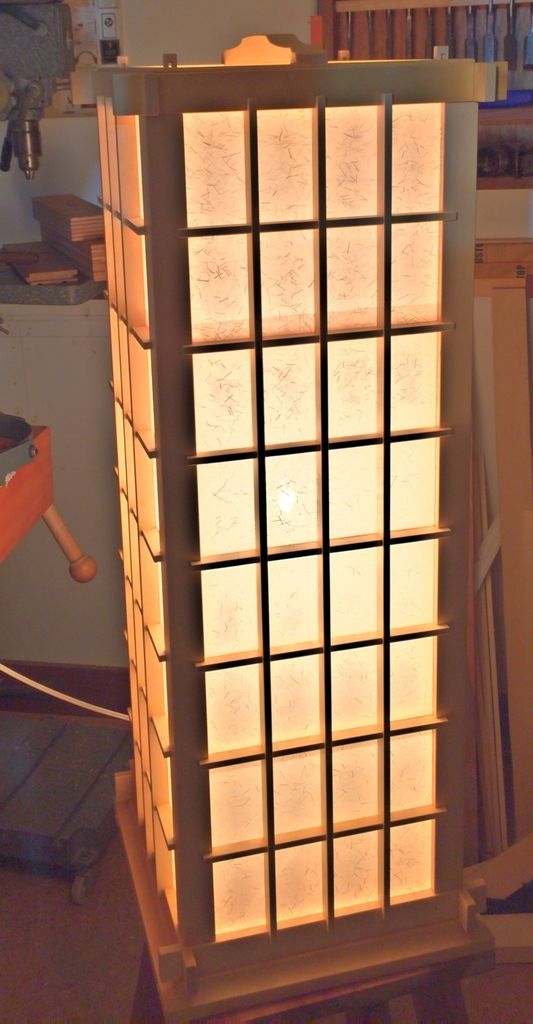
Yes! I have finally finished the Japanese lamp (andon) project, after two years of on and off effort. It feels nice, I am pleased with it and my wife likes it.

Here it is almost together for the final assembly.

Yellow cedar that I chainsawed myself a few years ago, then air dried followed by a gentle dehumidifer kiln drying.

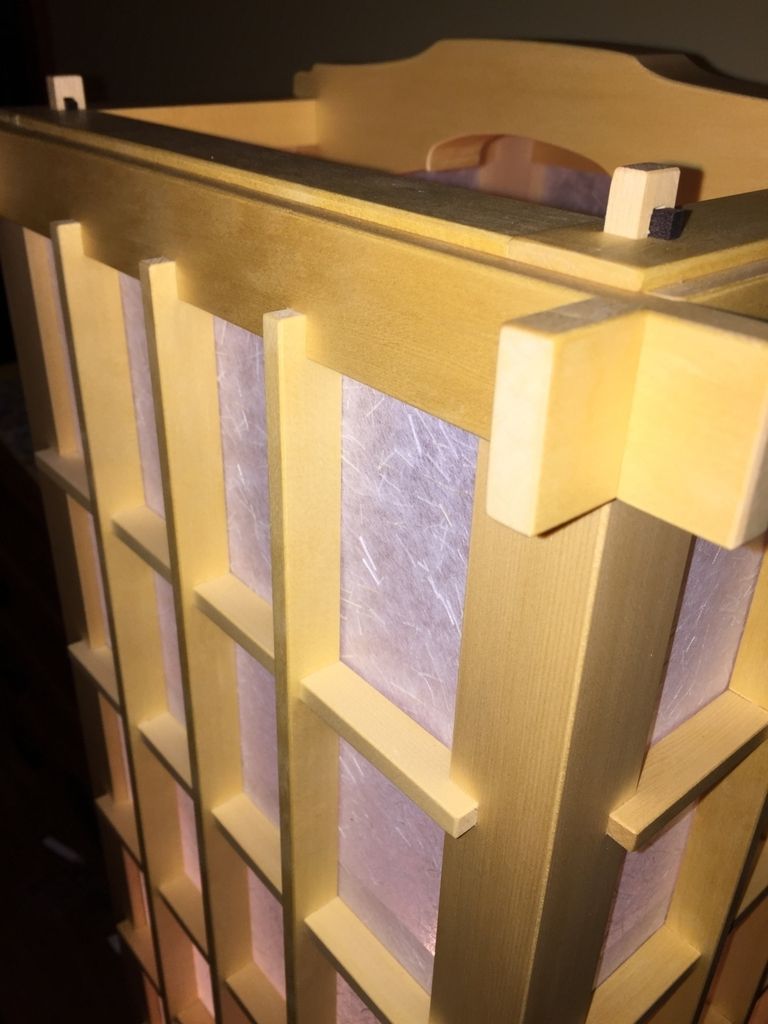
Several coats of hand padded shellac, some wax on the handle where it will see more wear. Japanese paper glued onto sliding frames with wallpaper adhesive. The four base pieces are wedged together, and the four vertical posts are wedged to the base. None of the other joints have any glue.


Special thanks to Chris Hall at the Carpentry Way for the great design and all the help and support.

Saturday, March 14, 2015

Soooo Close to Done

I had hoped to have the lamp finished by the end of last week, Now I hope to have it done over the weekend. I guess that is why I am the slow woodworker!

Had a small setback with the light stand. It fell off my tablesaw and cracked. Luckily it is not a visible part so I glued it carefully back together and re-tweaked the fit so the two pieces slide together smoothly.

And voilà, here it is back together and temporarily assembled into the base.

I put together a 'final' list of everything needing to be done, and went though it item by item. Here I am crossing off the last to-do, easing the edges of all the lattice pieces. That was a truly tedious activity.

So now it is all apart again and I have a couple coats of shellac on each piece. Maybe another couple coats today, followed by some wax, then it'll be time to do the assembly!


Monday, March 9, 2015

Inching Closer to Complete

Got the four insert panels made up and glued the Japanese shoji paper onto them using wallpaper glue. Hopefully that'll make it easier to take the paper off in the future should it ever get damaged and need to be replaced.

So here the panels are in a 'test fit' into the lamp that went surprisingly well, if a little fussy. Each panel being 29" tall slides down a matching pair of grooves in the posts. The grooves are about 0.02" wider than the panels, and the paper was about 0.012" thick, so there is only about .008" of slack for the panels to slide in. And each panel has to slide past the 7 horizontal slats without getting hung up.


The next step will be to take it all apart, run a plane over the visible surfaces to remove any marks that have accumulated over the past two years of kicking around my workshop, ease most of the edges, profile the base, open up the mortises slightly so I can wedge the tenons that hold the whole assembly together, figure out how to attach the light stand to the base, a few other fussy things, put on some shellac and wax, then reassemble.

I thought I was getting close to finished until I just wrote down everything still to be done!

Friday, March 6, 2015

Screens. Milling. Light Stand.

Incremental progress made on the screens. Have been taking a lot of care to make sure they fit properly. Once the paper is glued on they will need to slide the full 29" down slots in the lamp posts. One of the four below, shown resting on the paper that I will use.

Also finished the stand out of some scrap maple I had lying around for the light bulb that will go inside the lamp. The stand will not be visible so could be anything. A disassembled shot is below. The two pieces slide together at 90 degrees to form an X shape, the four ends will then be mitered to the insides of the base of the lamp. The light bulb assembly is screwed into the hole on the top and the cord runs through the hole and out the bottom of the lamp.

Got out for a couple of milling sessions recently. (Session 1, Session 2) Wood has been so-so recently. The log dump area is getting cleaned up so there are somewhat thin pickings right now. I have also worked my way through most of the logs that I marked and set aside earlier. Next session might be the last for a while unless more interesting stuff shows up.