Tuesday, December 21, 2010

Shop News

After having a couple cabinet ideas not work out, I was pretty bummed out so I turned my attention to the mindless task of flattening some of the short oak stock that had come out of the kiln with the last load. I cut most of the oak slabs in half lengthways to deal with the splits and bending in the middle, then planed them. This generated a ton of oak shavings. They went into the garden recycling bin, it's too bad they can't be used for something. Now I have a nice stash of oak for someday and I feel like at least I accomplished something finally.

I also did a bit of 'wood trading' with a guy I met who lives up in the Okanagan and so wound up with a half dozen nice slabs of fruitwood, including apricot which I have never seen locally. Happy about that!

I also have a lady who seems genuinely interested in buying a couple alder slabs from me. No idea how to figure out how much they are worth. Funny, I'll give them away to people I know, but want to make sure I get fair value when they are sold!

My "shop" energy level is a bit low right now due to the dead end projects. I have gone back to a birch slab table project I abandoned several years ago. The slab is virtually done, I am going to make the base out of catalpa. Hopefully it'll get my enthusiasm back up!

No more milling now until the new year. I am still licking my wounds (in the form of a badly beaten up chain) after hitting the rocks in the last elm I milled.

Happy holidays to all!

Sunday, December 12, 2010

Slab Table Travails

After I had the two slabs flattened I had to figure out how to trim off the ends. I wound up using the Hammond Glider with its sliding table. I simply raised the blade way up, held the slabs in place and slid the table past the blade. Of course I could only take about 1/8" on each pass, but it worked better than I imagined!

After that there was a crushing disappointment when I realized that the width of the boards where they come together was about 3" different. And that the combined shape looked like John Travolta in Saturday Night Fever.

I considered various other arrangements, including configurations that I call O,U, and S.

Although I am kind of fond of U, I'm pretty sure that my wife would allow any of these into the basement rec room, never mind out of it! Yet another deadend project it seems for now.

Meanwhile, I loaded up a bunch more slabs into the kiln. Quite a mixed batch, with a preponderance of nicely coloured maple.

Got one more day of milling in. Finished off an elm slab that I had started 6 weeks ago with the 60" bar. I trimmed the width down so it would fit with my 36" bar. Unfortunately I hit an embedded rock on the second cut and damaged a chain. I had a spare chain and couple helpers including a first timer, we peeled five slabs off it.

I took two slabs home, I was mostly interested in the spalted non-crotch end of the slabs, and in fact if I was on my own would have cut the log in half and not bothered with the crotchy end. But the two other liked that end, so we did the whole thing. I can always cut out the parts I like later, whereas it is hard to add length back in later!!


Sunday, December 5, 2010

Milled Slabs - Beginning to End

One of the (many) reasons I enjoy chainsaw milling is the unique sizes and grain patterns that you can get in the wood. It's always a bit of a surprise/thrill when I first cut the slab, and then again at the end of the process when it comes out of the kiln and gets cleaned up in the planer.  Freshly cut slabs often have spectacular colours that fade over time and cannot be brought back. But once the wood is dried and cleaned up, a more subtle look often emerges, although the loses can be discouragingly high in some species.

I mentioned in my last post that the oak I took from my kiln was 'splitty". In fact the main problem was that most of the pieces kind of "folded" down the middle a bit, like a really wide V shape. Most of the splitting was confined to the fold area, so it was a simple matter of cutting the pieces in half, which yielded two decent pieces.

Oak Slabs Freshly Cut

Oak Slabs Faded Quickly After Sitting Out a Few Days


Oak Pieces Cut From Dried and Kilned Slabs

Wednesday, December 1, 2010

Shop Goings-Ons

I was looking at the maple I selected for my planned cabinet, and it looks like it has a couple flaws in it. Sigh. I just don't know if this cabinet is ever going to happen. It seems the time is not right for it now in any case.

For the time being I have gone over to the dark side and decided to work on a slab table. Not the catalpa I was thinking of earlier, I have some crotch elm pieces, each roughly 29 x 37". I think two of them, bookmatched end to end might be an interesting piece. I guess the test will be if my wife agrees to let it out of the basement rec room or not when it's done!

These pieces are too large to run through my 24" planer, so I set up a simple flattening jig on top of my tablesaw using a couple of 2x4's and a router with a 1" bit. It worked well enough, but was rather tedious, extremely messy, and caused some kind of temporary damage to the nerves in my hand. Thick gloves are in order next time I do this!


Also managed to get down to the beach and take six slabs from an alder log. Normally alder is not that exciting a wood, quite soft and an unremarkable light brown colour. This one had some amazing colour streaks, spalting, and even some ray flecks.

I finally got the load in the kiln dried, conditioned, and unloaded. Hooray! As I had feared, the wide oak slabs were splitty. Oh well, 15" wide 2"+ thick oak still has lots of possibilities! Another load of odds and ends will be in there soon, possibly the last one for a while.

I went to a show put on by Coast Eco Timber. Wow, they have some very impressive slabs and do nice work with them. They have a similar ethos to mine about salvaging downed logs, they just do it on a much bigger (and hopefully more profitable!) scale.


Tuesday, November 23, 2010

Time to Rename the Blog??

I am seriously thinking of renaming my blog "Woodworking on the Event Horizon". Those of you who enjoy a good black hole joke may get a chuckle.

I figure that while I am working feverishly on things, it appears to the casual observer that my shop is at a standstill!

Sunday, November 14, 2010

Bringing the Ship Around to the Next Cabinet

Well I got one of the two motors finished. My local motor shop has been more than generous to me, in addition to throwing in the spray can of special paint for the windings last time, this time they pulled the motor's bearings and supplied new ones to me, all at no charge! They are definitely on my Christmas card list this year. This motor I blinged up with gold paint to lend it a touch-o-class. It'll look great on the bandsaw I want to restore, someday . . .

CGE 1 HP Motor Before

 After

Also went out and did another day of chainsaw milling at the beach. It was a beautiful late fall day with snowcapped mountains, crisp air, freighters from around the world in the harbour, and downtown Vancouver all in the background. I had a terrible day of milling however, the saws were naughty and I spent way more time fooling around with setups than with actual cutting. I wound up with 5 short slabs of very nice elm for my 3 1/2-ish hours of work. There's one more elm left there, then I hope I don't get any more elm for a long while!


I have been sidetracked from my woody activities in a major fashion, my dad gave me 2000+ old slides of his from the 50's to the 70's and asked me to scan them into my computer. I have started, it takes a huge amount of time, but it is kind of fun to see all the old family photos, many of them before my time.

In other news, I have made some planning progress on the cabinet. I did up some sketches, reviewed some other curved front cabinets, refreshed myself on laminating for the curved door, etc etc. Regretfully, I will not be able to use the oak I had previously selected. The pieces are just too narrow and will not yield the width I want. This was definitely a disappointment, as the air dried oak was a real joy to work with the plane.

However, I do have some mildly spalted maple with some nice suble colouration in it. I just ran it through the kiln a month or so ago. Because of the colours in it, it will be a tougher to use than the somewhat bland riftsawn oak though. But it will give me eight inches of width, more than I need.  Soon the oak will be a distant memory.

Thursday, November 4, 2010

Shop In Order

The Hammond Glider and the General 14" planer are both dialed in now, (other than dust collection), and I am really hoping to get to some woodworking now!

I do have two 14" bandsaws and two 6" jointers that I would like to restore. Also the Morrison Printer's saw. However, I think they will have to wait for now.

I am still working on the rebuild of the other two motors though. They are apart on my bench, but I am inching forward with them. A broken bolt has delayed things.

Decisions were made on the yellow cedar lined display case. I want it to be made of 100% wood that I harvested myself. I finally selected on one of my oak slabs that was nicely rift sawn to use on the exterior, and managed to cut some nice clear sections out of it. It was one of the ones in this photo, I milled it in 2008 I think.
 I also trimmed a piece of yellow cedar to use on the interior. It is a bit narrower than I would have liked, I will have to slip match the veneers that I cut from it. Browsing through my library(?) of yellow cedar pieces, I noticed quite a variation in colour and in grain pattern. I had always thought that the old growth yellow cedar was pretty similar - wrong! This one the grain lines are so tight I can't even see them (yes, even with my glasses on!)

I think I will use lumber core construction for the carcass. It'll be the first time for me. I selected a piece of linden that came from a tree about two blocks from where I live.  Linden is pretty soft, it's popular for carving. I think it is stable and should do well as the core.

Here are all the pieces, trimmed up and seasoning in my shop.


I also had a chance to spend a day at the beach slabbing up a couple big elm logs with one of my friends. Using the 60" bar with the mill on it on a crotch piece was an awful lot of work, and it took the both of us to push the mill. There just seemed to be a lot of fooling around with set up, trimming, saw adjustment, etc, so ultimately we did not get a lot of slabs, only six in total.

The load is still drying away gently in the kiln, a month now. It's taking longer than in the past as I am better able to control the rate of drying and I don't want to rush it.

Tuesday, October 26, 2010

Motor Madness + Busy Busy Busy

Inspired by the successful rebuild of the GE motor for the Hammond Glider, I decided to carry on and rebuild another identical one I've had lying around for ages, plus a 3/4 HP Brown Brockmeyer Induction-Repulsion motor that I picked up in Seattle several years ago.

Old motors are normally a simple rebuild, the main hassle is getting them apart and the bearings out. Order new bearings, clean and paint, maybe new capacitors if needed, reassemble and you are done! Quick satisfaction. Totally contrary to my mantra of the Slow Woodworker! Luckily the BB will require a couple of different machining operations that will likely drag that project out.

The latest kiln load is gently drying, and should be done in a week or so. As I have no more two year old air dried slabs left to put in the kiln, next I may put in a load of well behaved one year old softwood slabs, specifically a couple types of cedar/cypress. I find these dry with less fuss than hardwoods.

Meanwhile a couple busy days of chainsaw milling transpired. About 100bf of spalted maple slabs one day, they're over 2 feet wide, but short. Next day over to Thetis Island to mill up some arbutus, probably closer to 200bf, boards were more like 18" wide.

Maple
Arbutus
While I was cutting up the maple on the beach, a guy stopped to chat, turns out he has a property up the coast with a big arbutus that's down, he invited me to come up and slab it up. Wow!

I am reconsidering the next project. With the Hammond Glider sitting in my shop all shiny and rarin' to go, I definitely need to do something that will require its services.  So the slab table looks like its star is falling already, and the display cabinet's is rising again. Probably a good thing.

Also got the General 14" planer moved downstairs, it took four of us to lift that beast. Had the blades sharpened locally, they did about the worst job I have ever seen. I am seriously going to start sending my blades away to be sharpened properly. Installed them anyways and fired it up with the VFD. Super quiet and cuts well. I need to dial in some of the settings still, but I am really happy with it.

Friday, October 15, 2010

Hammond Finished!

Another busy week in the shop! It's nice to be able to make some solid progress for a change.

Got the Glider motor parts back from the media blasting, painted them, then when I was reassembling I noticed there was still a substantial amount of lead in the windings. So it was back to the motor shop. I wanted them to either clean the windings again, or seal them up with some special electric motor paint. Instead, they gave me a spray can of the paint I wanted and suggested I go do it myself! Perfect, I got it done fast, done right, done cheap, and I still have 90% of a can to do future motors.


Blinged up the motor paint a bit!

So I got the motor mounted on the saw and took the first cut. First impressions are that the saw is quiet and very smooth and cuts at 90.0000 degrees. Exactly what I had hoped for - Hurray! I notice that I started the rebuild on July 14, almost exactly 3 months ago. There are a few small tweaks needed, and I am still waiting for a new Forrest blade, but the heavy lifting is done.


Using my sound pressure meter, the Hammond registers 73 dB, versus my Powermatic 66 at 92 dB. Quite a difference.

Was able to get to the beach last week for a day of chainsaw milling with practically the entire class from the IP woodworking school. Great fun, we had three mills going at the same time, cut up half a dozen logs.


Also making some progress on the General planer, some modest cleaning done as well as a sharpening. Discovered one of the gibs is different from the other two, not sure if I am going to need to replace it or not. Plus the bearings on the bed rollers need replacement. Luckily, the bed rollers are not a critical piece, I'll order them on line but they'll take a while to get here. I disassembled the planer from the base so my son and I could carry it from the garage down to the basement. Wrong! Looks like it'll take four people to move it.

Still contemplating the next project. The curved glass front display case is sill high on the list, but I am thinking I may use one of my 6' long 30" wide catalpa slabs to make a slab coffee table.


I also rediscovered how satisfying it is to rebuild an electric motor. I also noticed that the old motor I had been using to keep my kiln door shut tight was exactly the same the one I just rebuilt! I have started to rebuild it, should be way easier the second time round!

Thursday, October 7, 2010

Soooo Clooooose!

I have had a real burst of activity in the shop the past week. The Hammond Glider is now rebuilt! Hurray! Now I've got the motor taken apart and taken it in for media blasting, then I will paint it myself and put it back together. I've got a new blade on order from Forrest, it takes custom blades due to the unique arbor. Won't be long now (I hope!) until I'm making sawdust with it.


The VFD for the General Planer arrived, and I tested it out on the planer - it worked great! I then wired the VFD into my shop. I need to get the planer moved from the garage into the shop now, get its knives sharpened, and do some minor cleanup and setup on it.

I finally got my recent load of slabs dried and out of the kiln, after a major struggle with the a/c unit. I reloaded it with about 400 bf of mostly oak, plus a few other odd 'n ends. I was planing to let the oak air dry another year, then I noticed that it was starting to split in the middle so I thought I had nothing to lose by throwing it in the kiln. A number of pieces are 30 inches wide, I guess if I cut them in half they'll still be decent.  However, I am running out of room in the garage now for dried slabs!!

I'm hoping for a major day of slabbing on Friday, some friends will be joining me, hopefully we'll get three saws milling at once!

Wednesday, September 29, 2010

Feeling Good!

I am feeling really excited about the Glider being close to being put in service. I took it all apart again, and my son and I moved it from my garage into my basement shop where I plan to use it. There I completed all the wiring, and started putting it back together for keeps.

The fact that the sandblasting shop lost a number of pieces quickly became an issue. I had to custom order several items from Fastenal. Several pieces had damaged threads on them, so badly damaged that I had to take them to a machine shop to be rethreaded.  I am also awaiting a portion of the tabletop from a fellow in Massachusetts, the sandblasting shop managed to lose my original, luckily for me this kind fellow is giving me a spare that he has. Anyways, the upshot is that the project is mostly stalled for a week or so until I get these parts all in.

I just hope that the saw lives up to its billing, unlike the Parks Planer which I have never successfully dialed in!

However, I did solve THAT problem by picking up a good condition General 130 14" planer. It's from 1966 I believe, and a more precision tool than the Parks. It has a 3 phase motor on it, so I have a TECO VFD on order and as soon as it gets here I'll put the General into service and then it is goodbye Dewalt plastic piece of sh*t planer and goodbye to Parksie too. And hello to a bit of extra space! I'll miss Parksie though, my son and I put a lot of time and $$$ into it. We did learn a ton from the process though too.

 14" General 130 Planer

 12" Parks Planer (AKA Parksie)


Friday, September 24, 2010

Slowly Coming Together

The Glider re-assembly continues. I have spent a lot of time removing paint from machined ways, threads, etc, but I think/hope that it's getting close.

The tables are all cleaned and fitted, the ball bearings are in, the micrometer gauge, finger and clamp are fitted on the tabletop, and the arbor is (temporarily) attached. Last is the raising mechanism, then I want to go through the motor myself before I attach it.


Meanwhile, the kilning has gone slowly. Who knew that it would take time to 'dial in' a new dehumidifier?? I thought you bought them, plugged them in, and forgot about them! However, the present load is getting close to being ready to take out, maybe even this weekend.

I did get out and slab up some beech the other day, first slabbing of the fall season and also the first beech I have ever slabbed. It was a bit short, but tough and hard work. The wood has some nice spalting in it.

Thursday, September 16, 2010

Hammond Glider Goes Back Together

I put a second load in my DH kiln. A mix of catalpa, elm, and Monterey cypress. Winter '09 was definitely the year of elm/catalpa! The dehumidifier died though, after four faithful years of hard service. I replaced it with a new one and things are dehumidifying away!

The Glider finally came back from the powder coating shop this week. It is very green! When I selected the colour at the shop, I swear it was a lot darker. Ah well, it's done now.

Stand on Wheels

Underside of Tabletop

Infeed Table of Jointer Makes a Fine Assembly Table!

I've started the reassembly, only to quickly discover that I did not document well the disassembly, so it's a bit of a challenge. Also, a couple pieces have gone astray, so I will need to replace them somehow. 

I am super happy with the media blasting, it took all the crap off and got right to the bare metal. It left an attractive texture on the bronze/aluminum pieces. Chrome did not fare so well but is still salvageable.

The jury is still out on the powder coating though. Clearly it saved me a ton of time, and I am happy with the finish. The shop did not do a good enough job of covering up threads, machined surfaces, etc. which means I will be spending some time removing paint from these areas. The areas they did mask, when they removed the mask, it tended to rip the coating and leave a very rough edge. I had to buy a pint of matched paint at a local paint shop for touching up these areas.

Lastly, it appears that log cutting season is here already, a full 5 weeks ahead of last season's start. I'll be down there tomorrow, hope to cut some beech and possibly alder. There is some oak, plenty of maple, and some PO Cedar down there ready to cut up over the next while. I will have to learn to be more picky this year, I really only have room for 20 new boards right now!

Thursday, September 2, 2010

Focus!

A problem I frequently have is getting bogged down in multiple projects. I  have to constantly avoid the temptation to start a new project before the current one is finished, otherwise I find myself overwhelmed with a shop full of uncompleted projects.

This week has been a good lesson in that.

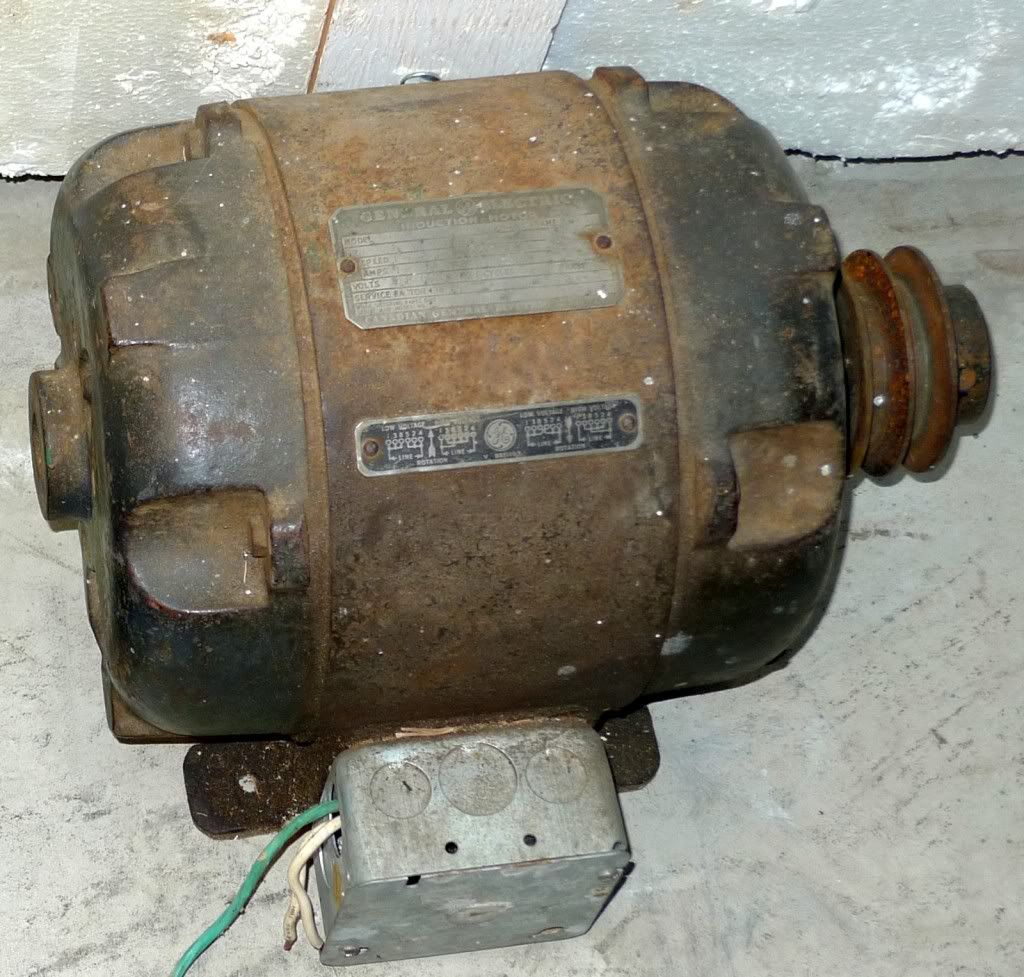
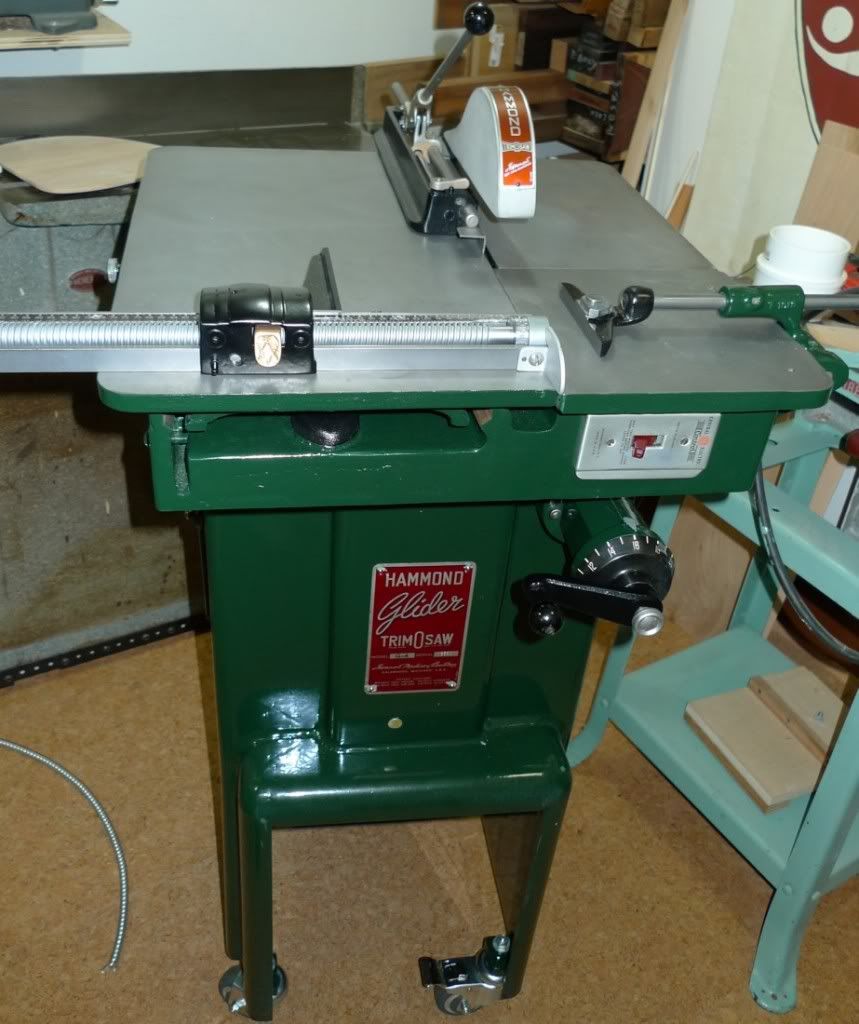
The current project is the Hammond Glider restoration. The unexpected arrival of the Morrison saw last week and the commensurate excitement for it almost threw a wrench into things. But when I realized that there is more work on the Morrison than I originally thought, I decided to leave it for now and stay focused on the Hammond.

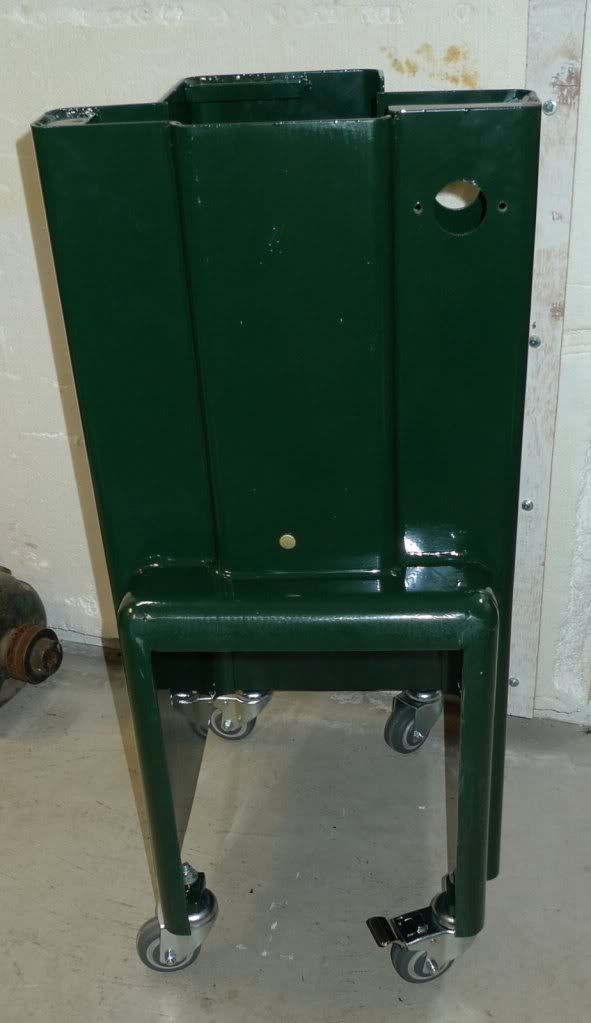
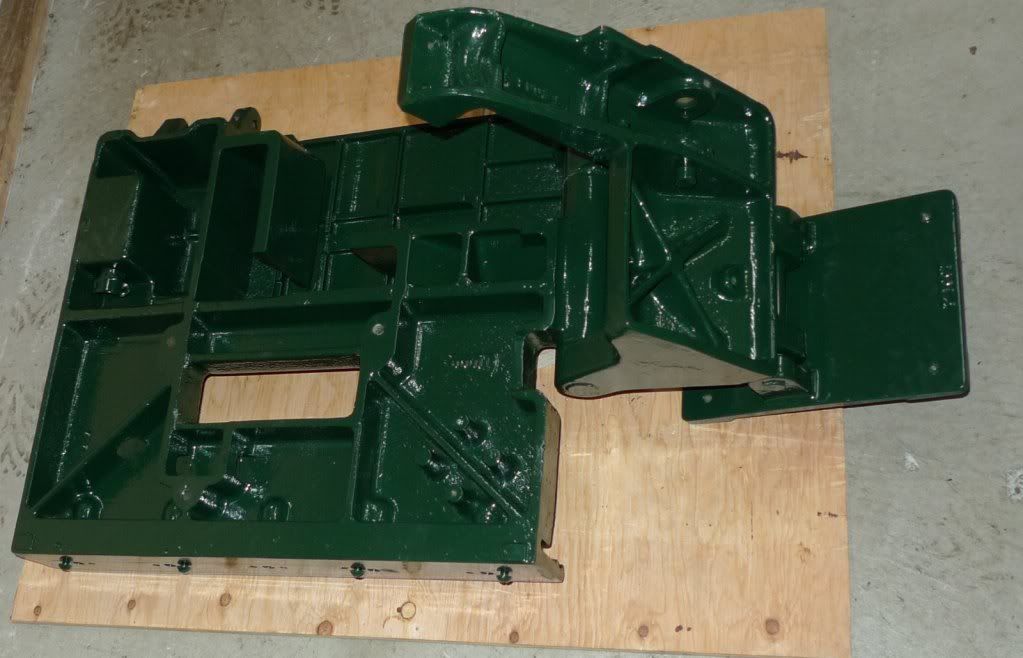
The Hammond has a number of parts that need painting. I learned the hard way that trying to repaint something like this with spray cans of Rustoleum is an exercise in total frustration. And a false economy.

Powder coating is the way I have decided to go, and I have dropped off the parts at a local powder coating shop.  I am anxious to have the powder coating completed so I can commence reassembly.


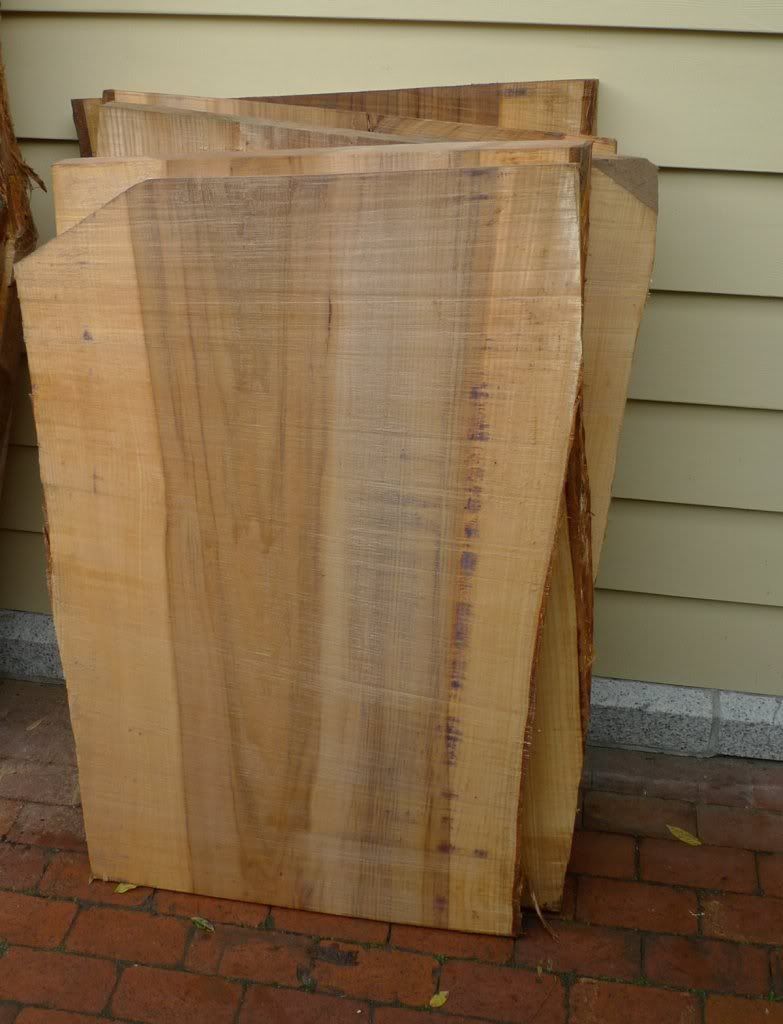
For the yellow cedar-lined cabinet that I am planning, I continued to search for the 'ideal' piece of wood for the outside. As I pawed through my wood pile again and again, the realization slowly dawned that  perhaps I don't actually possess the piece of wood that I want for this cabinet! I understood then that I was approaching this process the wrong way. It should be more  with the with the selection of the wood influencing the design of the cabinet, rather than trying to force a certain design on a piece of wood.

This insight was tremendously liberating and reinvigorating, and actually increased the number of possible candidates for the outside. Of course, the shape and design of the cabinet will now be somewhat different depending on the wood I choose, its pattern, colour, texture, weight, etc. But that's all part of the journey.

Crabapple                                          Red oak
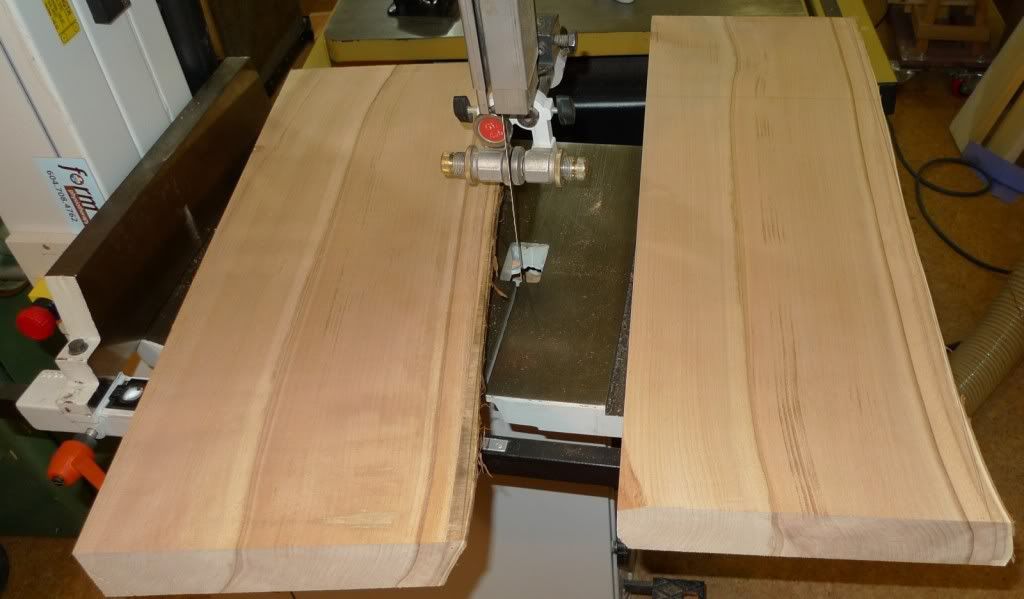
In any event, my intent right now is just to select the wood and cut it roughly to size. My hope is that it will dry more while I finsish up the Glider, then I'll be ready to focus on it!

Lastly, my first kiln load is now dry, it's down to around 8.5% MC. I am happy it only took two weeks. At this rate I should have three more loads done by the middle of October when the wet weather settles in for fall.

 Two Pieces of Catalpa in Kiln After Drying

Wednesday, August 25, 2010

Back in the Saddle

Well a month of summertime activities are winding down for me and I am getting back focused on shop stuff.

I continue to go through my wood inventory looking for a suitable exterior wood to work with the yellow cedar interior showcase cabinet I am planning for my next project. No winner has emerged yet, although rift sawn oak is the current front runner.

The Hammond Glider tablesaw has returned from the media blasting shop. I am very happy with the results, all the parts are completely clean, and the shop did careful and sensitive work on the many smaller parts. I have decided to powder coat it, I will need a few days to prepare it for this step. A few parts will need to be rechromed as well, then I will be ready to commence the reassembly.

Saw As Purchased

Stand After Media Blasting

I managed to score yet another printer's saw, this one an even more obscure brand, Morrison. It does not have the ball bearing sliding table of the Hammond, but is still a precision instrument for crosscutting. It had already been converted from lead type cutting to woodworking, so I thought there was no lead dust left on it. Unfortunately when I got it home this proved not be the case, I will need to spend some time cleaning it but it is nowhere near as bad as the Hammond was. I am excited about this one and hope to have it up and running in the shop quickly.


I put my first load of the season in my dehumidifier kiln recently. These are slabs that I cut the winter before last so they have had two full summers air drying outside. Several weeks of gentle drying in the DH kiln should bring these slabs' moisture content down from 14% to about 8%. By Christmas time hopefully I will have run a couple thousand board feet of locally harvested spalted maple, catalpa, elm, cypress, etc. through the kiln.

Finally, a small triumph.I was able to level the tables on my antique 8" General jointer and set up the cutterhead so as to completely eliminate snipe, thanks to a 4' Starrett Machinist's level I recently purchased. I look forward to using this simple but fine tool to help me dial in a number of my other antique woodworking tools.

Saturday, July 24, 2010

Hammond Glider Teardown Finished

After the arbor I focused on getting the motor off. Conceptually it was easy, since the motor was bolted to threaded holes in the motor plate and all the bolts were easily accessible.

Practically though, the motor is extremely heavy, covered in a thick coating of lead dust, and mounted to the underside of the motor plate. Thus it would be all too easy to have the motor come crashing to the floor while removing it, sending up a cloud of toxic dust while also damaging it.

So I first bagged the motor up in a couple plastic bags in an attempt to contain any dust.


Then I clamped the motor's "feet" to the motor plate so it wouldn't fall as I took the bolts out. Finally I made a simple ramp from the saw to my van out of a couple pieces of plywood. I dropped the motor onto the plywood and pushed it into the van.

Once the motor was off and in the van, I turned my attention to the main table casting. It is held on by three large machine bolts. These provided only token resistance and were easily removed with a humongous Allen key.


The table was shimmed at the factory under these three bolts, so it was critical to not dislodge or lose track of any shims as the table was removed. Further, the shims needed to be marked so that they could be reassembled in the same position.


 I slid the table onto the same plywood ramp I used for the motor, then pushed it into the van.


Lastly was the base itself. Although I could not lift it, I was able to tilt and slide it into the van on my own.

I then disassembled the smaller assemblies which I had not done at the start, mainly the arbor and the clamp. With everything apart, it's off to the media blasting shop next!