Sunday, December 28, 2014

Well the walnut and yellow cedar boxes grew up and left as Christmas gifts for their new life. I changed one of the walnut box's handles to a piece of dark wood from the holly. I like that better.


Here is a family shot before the kids grew up and went their own way. 

I put shellac and a couple coats of oil on the last three, the catalpa, cherry, and elm. The elm and the catalpa had flat lids while the cherry had a thicker lid that I was able to put a small curve into. Annoyingly the cherry lid's grain was much more spectacular before I planed it into a curved shape, I guess just a few degrees off QS and 'poof' went the figure. Ah well, I still like it and all three of these will be gifts in the new year. 


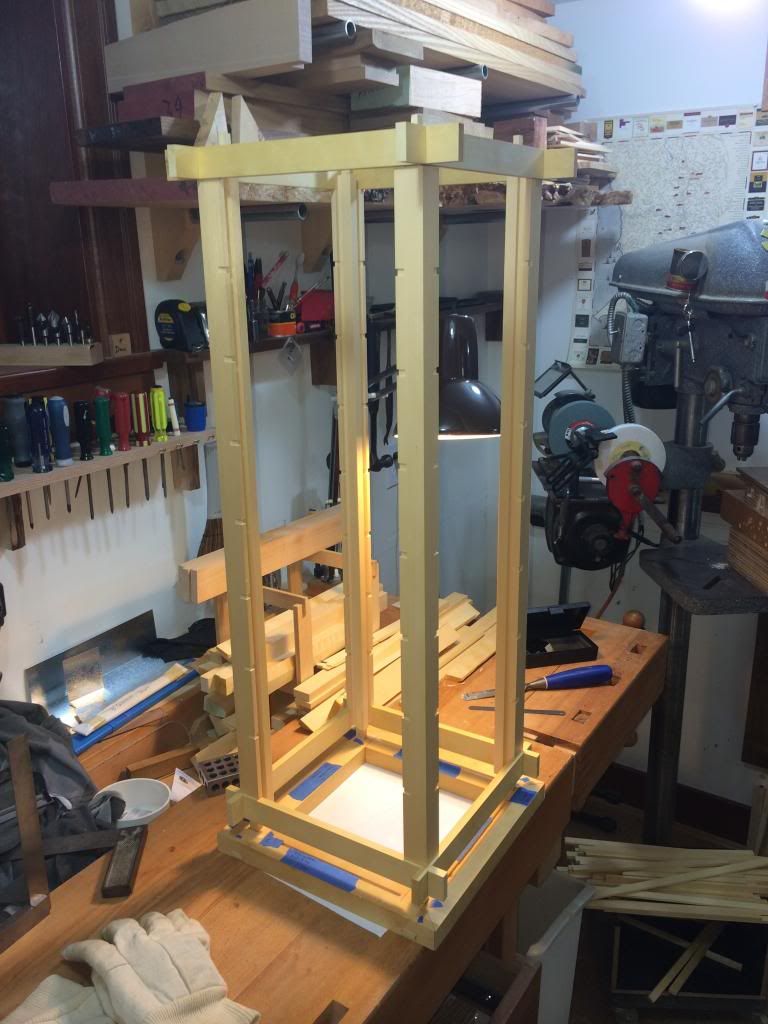
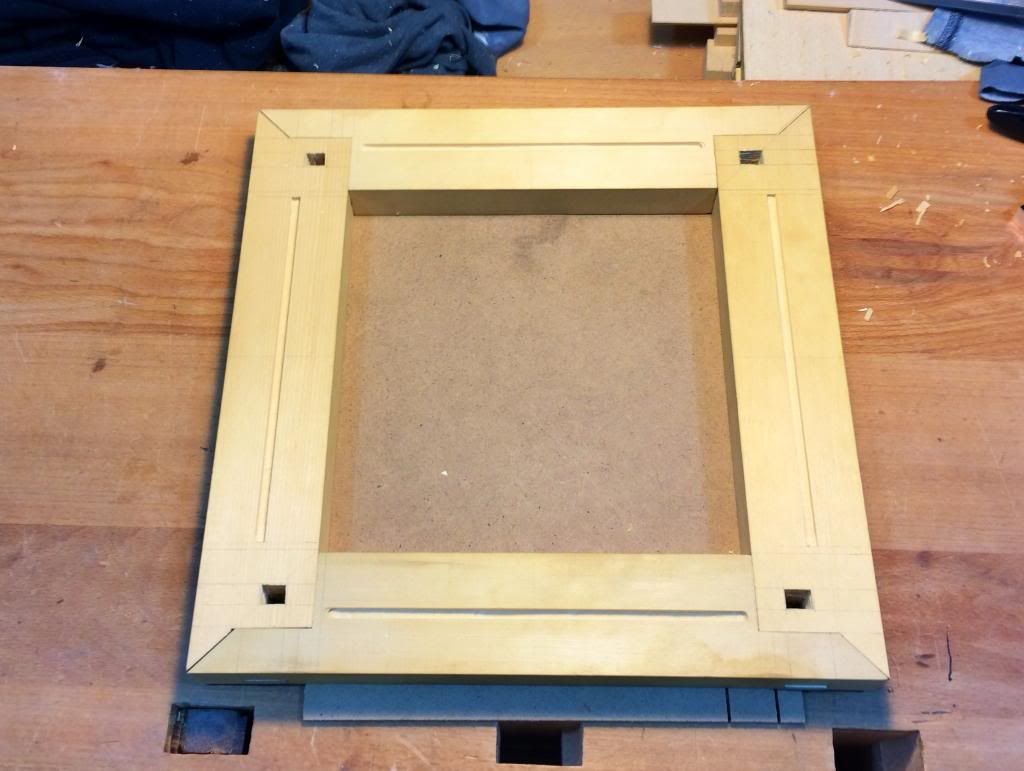
And, the good news is . . .  I have actually got back to working on the shoji style lamp and am making some decent progress on it. 
In particular I managed to fit the posts and the lower tie ring into the base, which took most of two days. I also started on making the bridle joints on the horizontal slats. Every step that I do I find I need to go back and tweak and refit stuff from previous steps. It is such precise work, I am giving my calipers and feeler gauges a real workout! Once the horizontal and vertical slats are done and in place (please, allow me to dream!) it should look very close to its final look.

And in the setback department, I was outside doing some work on the oak slab table that I am also working on (notwithstanding my sacred vow to only work on one project at a time) when it started to rain. Made a mess of the grain, now I will have to re flatten it probably. Following on in the same vein, there was a wee flood in the basement today that left water puddling on my Hammond Glider table saw. Not impressed, definitely not impressed. Thankfully I caught it early and no real damaage seems to have been done. 

Sunday, December 14, 2014

Boxes on the Home Stretch

Managed to get a first coat of oil on the outside of the two walnut boxes, that was on top of a washcoat of shellac. I need  to get these two done by Thursday, in order to give them as gifts that day.

Should be able to get two or three more coats of oil on by then. I use the Tried and True varnish, which takes a good day to cure for the next coat. The handles are holly, I am thinking of making them a bit lower profile, or perhaps switching to a dark wood instead. They seem a little too dominant in white.

The other boxes are all glued and other than the yellow cedar box, also shaped. I still need to profile the lid of the cherry box, the other three boxes will have flat lids.


Friday, December 12, 2014

Box Progress, End in Sight

I have really enjoyed being able to devote a lot of time to these boxes recently. Perhaps the need to get them done in time for the holidays has been a motivator . . .

This picture nicely shows the progression from the yet to be assembled  yellow cedar box with a London plane base on the top left, through to a walnut box on the lower right with the sides and the top shaped, and the top with a holly handle in place.

These woods have all been such a pleasure to work with a sharp plane. All milled and air dried by myself, other than the walnut which was a gift from a neighbour, whose in-laws had milled it in Oregon 30+ years ago. It's nice when the wood has a story to it!

Need to get the yellow cedar box glued up and shaped, then I can focus on the last few lids. After that it'll be the finishing. Probably oil for the walnut, elm and maybe the cherry, shellac for everything else. The original design called for brass pins to help hold the joints together, since there are limited gluing surfaces that are not end grain. I will probably add the pins just to be sure.

Need to get the first two finished by Thursday in order to be able to give them to friends that I will be seeing that day for the last time before the holidays.

Monday, December 8, 2014

Firing up the Planer! Boxes!

Well I cranked up my old Jonsereds 24" planer this afternoon. I had a couple slabs of newly dried cherry that I wanted to clean up, so I wanted to take a bit of a break from the Christmas boxes project, and run one of the slabs through the planer.

However, it had been a while since I had put new knives into the planer. I am good about keeping track of when I install sharp knives, but not so good at actually installing them it seems.

March of 2009? That was the last time I put sharp knives in the planer? Ouch, that's embarassing!

Obviously well past time to do something about it. However, the cutterhead has four knives, each 24" long, that is a lot of knife setting. So rather than spend the rest of the day putting in new knives I thought I would screw up my courage and try out the planer's blade honing system. These big planers often came with built in grinders and honing stones, and this Jonsereds did. Unfortunately the built-in grinder was damaged in transit to my house when I acquired the planer, and it runs on 575V 3 phase anyways, but the honing stone is intact.


To hone the blades you remove the dust hood, then turn the silver coloured wheel until the stone is just kissing the blades, then turn a handle at the other end of the acme rod, thus moving the stone across the length of the blades. This puts a back bevel on the knives and takes out any minor nicks, good as new! Simple! Oh, did I mention the planer needs to be running to do this?


It was a bit intimidating and I had to do about 5 passes until I got a nice bevel on all four blades, but once I was able to exhale and breath again, it went pretty smoothly!

Next step was to mount the slab on on a tornsion box. This allows me to effectively 'joint' the first side of a slab up to 24" wide on the planer, as my jointer can only handle up to 12". I apply hot melt glue liberally to hold the slab to the torsion box, and to hold  wedges in place under the slab to support it. Here is the slab after a couple passes.

 And after a couple more passes it is almost done.  

Oops! I let the cyclone's garbage can overflow.

I took out about 5 garbage cans of chips and put them into my garden waste recycling bin. Luckily tomorrow is collection day so the city will dump my bin and I can make more chips. All this was from a single slab that was just under 3' long and max 2' wide. Once you are cutting close to a full length and full width the chips fill up quickly. I got less than two passes before the garbage can overflowed.

I had to end the planing early as the neighbour complained that when I ran the planer it made the lights in his house dim so much they went out. Since the planer is in the garage at his house, and him and I both rent from the same landlord, it seemed wise to maintain the neighbourly peace. So I agreed to only run the planer when him and his wife are away so it won't bother them. That will crimp things a bit, but since I don't really use the planer much it should still be OK.

So back to the boxes tomorrow.No more chainsawing until the new year.


Friday, December 5, 2014

Still Underway . . .

Well the Christmas gift boxes project is roaring along. I need to get these done before they become new year's gifts!

All the sides have been cut out, fitted and are ready for shellac on the inside. I have even optimistically mixed up a fresh batch of shellac, ready to go. Outsides will have their finish applied later.


Bottoms are all sized and just need a final touch up before having shellac applied. I even made up a spare bottom piece! Of course since I made it up I didn't need it, not yet anyways. Kind of like bringing along an umbrella on a cloudy day.

The three bottoms on the left are Monterey cypress, I decided on that for the bottoms on several of the boxes since it is so nicely aromatic. I have noticed in the past that the sap on it tends to be a problem though, so I plan to bake these pieces in the oven for an hour or so to 'set' the sap. Two other pieces are London Plane (similar to sycamore) and the two on the right are maple.


The tops are not as far along yet, cut out and the upper surfaces planed, but that is about all. Need bevels on the botom, shaping on the top, and handles.


The boxes look a bit clunky to me right now, but I made them to the same dimensions as in the article I saw in Fine Woodworking. All four sides will be shaped, I am hopeful that will help give them a more delicate look. It better!


Meanwhile, the Japanese lamp project languishes on the corner of the bench. Don't worry Lamp-san, I will get back to you eventually!


Saturday, November 22, 2014

Under Way!

Out milling a couple of times recently. Lucky to have had gorgeous weather both times.

First outing of the season milled up some maple and some cherry.

Second time out was Port Orford cedar and Monterey cypress. Gave all the PO away, Only kept a couple small chunks of the Monterey. I have way too much of it already.

Also got a third load of cherry into the kiln. I think I have enough material to dry one more kiln load after this. It'll be a mixed load of cherry, elm, some softwoods and I'm not sure what all else. Unfortunately it is buried deep within my pile and will require a bunch of moving around to get to it.


And made a bit of headway on preparing stock for some Christmas gift boxes. Hoping to make 6 boxes with wood that I have harvested locally, based on a design I saw in FWW several years ago. Right now looking at elm, yellow cedar, catalpa, cherry and walnut for the sides. Lids and bottoms still TBD. The sliding table saw is nice for cutting stock to a precise length.


Sunday, November 2, 2014

Fall Startup


Things were even slower than usual over the summer and early fall here at the Slow Woodworker. I am thinking of changing the name of my blog to The Almost Ground to A Halt Woodworker!

A summer of family activities, including some travel and working with my son on rebuilding a 1971 Austin Mini took priority over the woodworking.


One small woodworking activity I did manage to accomplish over the summer was levelling an elm slab that was too big for my planer by using a router jig. I have no idea what I will use the slab for, but at least it is flat and level now!


I still have the yellow cedar Japanese style lamp and the oak slab small table that I want to complete. I also would like to make a couple of simple boxes to give out as Christmas presents.

The chainsawing season has started up at the local log dump area. There are quite a few nice logs down there that I hope to get to over the course of the winter. Unfortunately it started up a month later than it normally does, then just before it opened I broke a finger. I still have four more weeks in a splint, but it is feeling good and I am hopeful that chainsawing will not be too hard on it!

One thing I did manage to do was get a couple loads of wood through the kiln. These were all slabs that I milled up at least two years ago. I think two years ago was when a lot of cherry stated appearing at the log dump, so most of these slabs were cherry. Also a bit of Monterey cypress and some elm. Probably have enough slabs for two more kiln loads over the next couple of months. However, since my woodworking output is so fantastically mismatched with the amount of wood slabs I am sawing and drying, a huge surplus of slabs has once again built up. So rather than resolve the problem, I have elected to create more storage space by sellilng off some of my old woodworking machinery that I purchased with the intention of restoring and then using.


Here is a picture of my woodpile on the side of the house, in the middle of me pulling out slabs to put in the kiln. Everything I mill up goes in this pile for two years to dry out to about 12%, before I put it in the kiln, which takes it down to about 8%.


Sunday, May 25, 2014

Getting Jiggy

Was able to spend a few hours on the Japanese lamp project recently. Each of the four faces of the lamp has a grid on it with 3 vertical pieces and 7 horizontal pieces. The horizontal grid pieces will terminate on the 4 vertical posts, while the vertical grid pieces will terminate on the upper and lower tie rings.

So recent work was to make the bridle joints in the tie rings where the vertical grid pieces will terminate. There are 24 joints in total, and each one looks like this:


The first step was to set up my shaper table (which I have converted to use router bits) to do a cut on one face, then do a cut on the second face. I did a cut for the middle joint first, then used that cut to register the cut for the two outer joints. This pic shows the crazy jig I set up to do the cuts on the second face.


The  next thing was to square up the ends of each of the cuts. First I lined up a nice square block of scrap with the leading edge of the cut.

Then I used the face of the scrap to register a couple of setup blocks.

Next I registered a larger setup block against the previous two. This gives me the edge I am going to trim to.


Not sure why this next picture got flipped 180 degrees, but this shows the block in place and ready to trim the back of the small mortice. Notice too that I had to gang the tie ring pieces together with a spacer so that the block I use to trim the mortices will have something to rest on.

And voila! All the mortices are squared up.
Next was to cut the last part of the joint, the 0.25" groove. I decided to use my trusty old horizontal morticer. It doesn't see much action, but when I need it it is sure great to have! First I set the height of the cut using a couple set up blocks. A bit of tweaking ensured but soon it was set right.

Then I set up a couple stop block and a block at each end of the tie ring piece being drilled.

After that I held my breath and drilled the first 1/4" deep mortice. It worked great! 1 down, 23 more to go! Then I will need to trim each of them by hand.
The next thing will be the horizontal and vertical grid pieces. Those will be super picky too!

Sunday, May 11, 2014

Lamping Along

Finally making some serious headway on the Japanese shoji-style lamp! Love working with the yellow cedar.


Sunday, April 27, 2014

Milling Maple

Milled up some maple with a friend the other day.  Usually I am milling up urban trees. It was nice to pick up some wood from a tree grown in the forest. 


Some progress on the Japanese style lamp, but a couple setbacks have cost me some time so no new pictures. Really trying hard to focus on this project.

Also had to order some new knives for my 14" General planer.

Tuesday, April 15, 2014

Milling

I did have a day of milling at the beach last week, Port Orford cedar and some crappy cherry.


Wednesday, March 26, 2014

Progress and a Visit

I completed the conversion of my printer's tablesaw to inches. The last step was to trim and drill an off-the-shelf ruler to fit where the old one was. Since I didn't want to cut any aluminum in the house, I clamped the ruler between a couple blocks of wood and trimmed it out in the lane using a sawzall, followed by an end mill in a router to clean it up. Worked very well.


Next, a psuedo-success.  I got all the insulation installed in my dust cyclone baffle. I used acoustic tiles, along with some eggcrate foam. Unexpectedly, or more properly due to lack of foresight on my part, the acoustic tile made the thing too heavy for me to manage. Luckily my son was home from school one weekend and I recruited him to help me maneuver it into place. Here is a shot of it before I sealed it up and put it in place.
The square hole at the top left is where the cyclone exhausts into the baffle. I was disappointed that noise level was not significantly reduced with the addition of the insulating material. I am pretty sure that I  made an error with my previous measurement which showed the baffle without any insulation causing a 20 dB drop from the unmuffled noise level. I found that adding the insulated baffle only yielded a 5 dB drop from the unmuffled! So I'm scratching my head on that one, but really, there isn't much more I can do, other than maybe seal up a few cracks.

Also made some decent progress on the long delayed Japanese style lamp. I got the base pieces cut out and did a first test fitting on it. Still a bit of tweaking to go to close up the cracks, then onto the posts. Hard to envision the finished piece from this I know! It will be about 3' high and a foot square, shoji style.


Also managed to get out and mill up some cherry. You can see the full report here, but this is what we cut by the end of the day. Not huge logs, but it was very nice material, I have high hopes for it.

Finally, I managed a trip to Los Angeles for the first time in many years. The highlight for me was the Gamble House in Pasadena. What a stunning monument to the Craftsman style. And what a shame that Vancouver cannot find the willpower to preserve its heritage houses.


Sunday, February 16, 2014

Moving Along . . .

Got out and did some milling with a buddy yesterday. It was out in Chilliwack, a lot of work for not a huge amount of wood. Some nice maple with a bit of stain on it. It turns out that milling on the beach is a lot easier than milling in the middle of a freshly logged lot covered in mud and hills and slash where you have to carry everything to and from the car!

Also finally got started on a muffler/baffle for the cyclone. I tested it this morning, just with the plywood box, and wow did it ever make a huge difference. It dropped the noise from around 90 dB to 70 dB. I am hopeful that once I get the box properly sealed and insulated with acoustic tile and eggcrate foam that it will drop even further.

Have been working on a small table out of an oak slab. The slab is a bit rustic, but I intend to use it for kneeling on when I am at my comptuer rather than using a chair. We'll see how that goes!

The slab had some cup in it, but I have it flat enough for what I need. I am just making up some legs for it. Ooops, first set was too short. That was quite a bit of time wasted, but a good chance to discuss the old adage 'measure twice and cut once' with my daughter. She found the saying quite amusing, either than or she found my mistake totaly amusing.

My Hammond Glider table saw is rocking now. The conversion of the unit from pica to inches is complete, other than fitting the new ruler. I also decided to buy a new blade for it, and wow did that make a huge diference, even though I had the old blade sharpened locally, it was like night and day.


Saturday, January 18, 2014

Things are Starting to Happen

Finally getting a few things done around the shop.

House nearby being torn down and McMansion-ized, I managed to mill up some of the big beech that was in the back yard. This was the biggest tree in the neighbourhood by far, such a shame it was mowed down.

Couple weeks later down to the local log dump, scored some more beech, and some cherry.

Beech is one of the few local woods that I had not seem much of to mill (the other notable one being ash), now I have bucket  loads of it! Well, I will have in a few years after it dries.  Funny how I have gone years with little beech, then twice in a row - beech!

48x48x3" slab of beech

The cyclone silencing project continues slowly. Next step will be to finish insulatng the inside of the shed it is in with acoustic tile, and then to build a muffler for it.

In the shop, I have finally started on a long desired upgrade to my Hammond Glider sliding table saw. Since it was orignally built to be used in the printing industry, it is set up to measure cuts in units called 'pica', which are annoyingly not related to either Imperial or Metric units of measurement! So basically I need to replace an Acme rod, the nut it runs in, and the ruler scale. Seems easy, but of course these things never are.

The picture might be a bit confusing if you are not familiar with a Hammond Glider tablesaw, but basically it only does crosscutting, and the portion of the table to the left of the blade slides. The piece being cut is held against a built in crosscut fence, which contains a threaded Acme rod used to locate a crosscut stop. Picture form the bottom up shows the new threaded rod in place in the crosscut fence, the old ruler, the old rod, and the future new ruler. Note the blade at the top with its unique holding arrangement! The hard part of this project will be making a new Acme nut for the crosscut stop, I am hoping I can simply modify the old one.

Of course while I was at it I thought it would be a good time to address the fact that the blade is not straight to the table, and there is a bit more wobble in it than I would like to see. So, the start of another project while many others are already on the go!