Tuesday, August 7, 2012

Box Finished, but Not Done!

Well I did some prefinishing on the box. Several coats of shellac on the inside/bottom, and Tried and True varnish for the outside. I prefinished everything except the outside faces where the through tenons will show. I will do those with Tried and True after assembly and trimming the mortices.


Then I dry assembled the box, next step will be to do the "glue up" which will consist of gluing all the wedges into the tenons. I think there are 30 tenons, so 60 wedges. It will be a process!

Some people don't care for Tried and True as it takes a while to dry, but I find it works well when applied in very (extremely!) thin coats with a couple days between coats. I love its total non-toxicity, no metal driers or other bad stuff in it as other BLO products have. (I'm still looking for 99+% pure ethanol or propanol to dissolve my shellac flakes in so I can get away from the additives in shellac reducer!)

Meanwhile, I decided to start kilning the slabs which I had milled in the winter of 2010/2011. They now have nearly two full summers of air drying. I would normally wait until early October before putting wood in the kiln as August and September are the best (driest) months here for air drying. But I have so much wood that has to go through the kiln that I figured I better get started now or I'll still be doing it in January!


I put in some alder, spalted maple, yellow cedar and Deodar cedar, all of which I have found to be pretty well behaved in the kiln. I also put in a few pieces of cherry and one slab of beech, which I have not had such good kilning success with in the past.Fingers crossed this time.

The yellow cedar I had originally milled to 8' 6" long, I don't know why I do that as the kiln can only accommodate 8' lengths! Rather than cut them down to fit in the kiln I decided for the better ones to just clean up the edges and store them in the garage. 13" wide, 3" thick and 8' 6" long quartersawn old growth yellow cedar. They are some pretty fine planks I must say!

Thursday, July 19, 2012

Box Prrrrroggrrresssssss

Things have definitely slowed down here for the summer. Must be the stifling heat - it was 24 degrees here today, I don't know if I can stand much more of that extreme weather!

The Japanese box suffered a setback several weeks ago when it lost a battle with the router. Fortunately the damage was contained to one corner of one of the side pieces, but it still required that I cut out the damaged piece and glue on a new one.

I was reasonably happy with the grain match, but the colour match was not what I had hoped for. I think the patch piece being freshly cut will need some time to oxidize in the air so it will darken and hopefully match the rest of the side piece.


Now I have all the router work done, all the edges have been eased, and the box is ready for finish and glue up. I think I will prefinish the inside with shellac and the outside with Tried and True oil.

Tuesday, June 26, 2012

Wood, wood everywhere, and not a . . .

I dropped by the woodlot at the beach today. Not sure why I even bothered, just to torture myself I guess. Since the wood pickings were a bit slim this past winter, of course now that it is summer and the beach is closed to chainsawing, there is a fantastic selection of wood to be had.


It appears that some eager beaver(s) who got there before me marked all the biggest and clearest pieces of Port Orford (D2, D8) cedar and Monterey (D1, D3, D4) cypress. There was also some deodar cedar (X). The Port Orford pieces were at least 2 feet in diameter.


Monday, June 4, 2012

Japanese Chisels - Tapping Out

I took a break today from the Japanese box to shower some TLC on my Japanese chisels. Three of the larger ones had never had their backs flattened properly. Mainly because it was way too tedious, but also because I rarely use the larger sizes.

After some token flattening on my new coarse diamond stone, I realized that the leading edge of the bottom on these chisels was curved up to such an extent that what was needed was to tap the front of the chisels with a hammer. I gather this is a fairly common set up activity among Japanese chisel owners.

I won't get into the details of the operation, a google search will yield plenty of information. My own observations are that is should be called 'bashing out' rather than tapping out as it takes way more force to get the steel to move than tapping would provide. I wound up using a carpenter's hammer on a piece of railway track to get one to move! Further, a caution that the leading edge will chip if you are careless and hit it directly.

Anyways, now my Japanese chisels are all flat and sharp and ready to go! That only took all day.

Tuesday, May 29, 2012

A Bottom Achieved

Well getting the bottom flat and dimensioned turned out to be way more work than I had expected. I guess my less than stellar work at school on the "perfect board" exercise to hand plane a board perfectly flat came back to haunt me on this one!


One of the two boards I used was reasonably well behaved, it flattened readily and stayed flat. The other, not so much. Anyways, I got them as close as I could/dared on the machines, then glued them up and handplaned them down to thickness.

I was annoyed at myself for a long time because of my mistake on the length of the two original boards I had for the bottom and the fact that I liked their grain pattern better than the pattern on these two boards I had to go with. In the end I am happy with these though, the grain pattern turned out to be acceptable. I wish it were a bit straighter, but I didn't have much choice.

Tearout while planing was a challenge with the contrast between the hardness of the earlywood and latewood on the Monterrey cypress, as well as the grain direction changes, but my Krenov style plane really saved me.

Now the next step will be to get some grooves routed in the bottom and part way up the sides for a couple of dividers. Since it is supposed to be a tool box, I'll set the two dividers something like this so a plane will go in each compartment. Eventually(!) I will make a tray to fit on top of the dividers. Really, I will, I already have some wood selected for it.


Tuesday, May 8, 2012

Box and New Lathe

Progress on the Japanese box has been, by my standards anyway, stellar.

The two new pieces of Monterey cypress for the bottom are trimmed and dimensioned close to final size. I am letting them sit a few days again just to work out any last tension before I take them to final thickness and glue them up. So far I have not cut these pieces too short!


The caps which go over the end pieces and handles are ready. These will be fastened by floating tenons that are fox wedged into the ends and handles, and wedged into the cap itself. The mortices will be 1/4" thick, but they need to be cut into the tops of the ends and handle which are only 1/2" thick and not visible with the cap in place. Seems like a ton of room, but there is a lot to lose here if not done right. So I have measured about 17 times, even cut a spare cap and drilled some holes in it to verify my alignment. If this project never gets mentioned again you will know why!

 Cap top, test cap centre, end bottom

Meanwhile, I somehow decided it would be a good idea to buy a metal lathe. So I picked up this rare (or more correctly, obscure) Standard Modern 9" Utilathe which was made in Canada maybe in the 50's, I am not sure on the date. Similar to a South Bend but a bit nicer machine. Obviously the first order of business will be some cleanup. Then I need to learn how to use it so I can make up missing round pieces on the tools I restore!


Tuesday, May 1, 2012

Japanese Box, Jointer, The Big Bandsaw Brothers

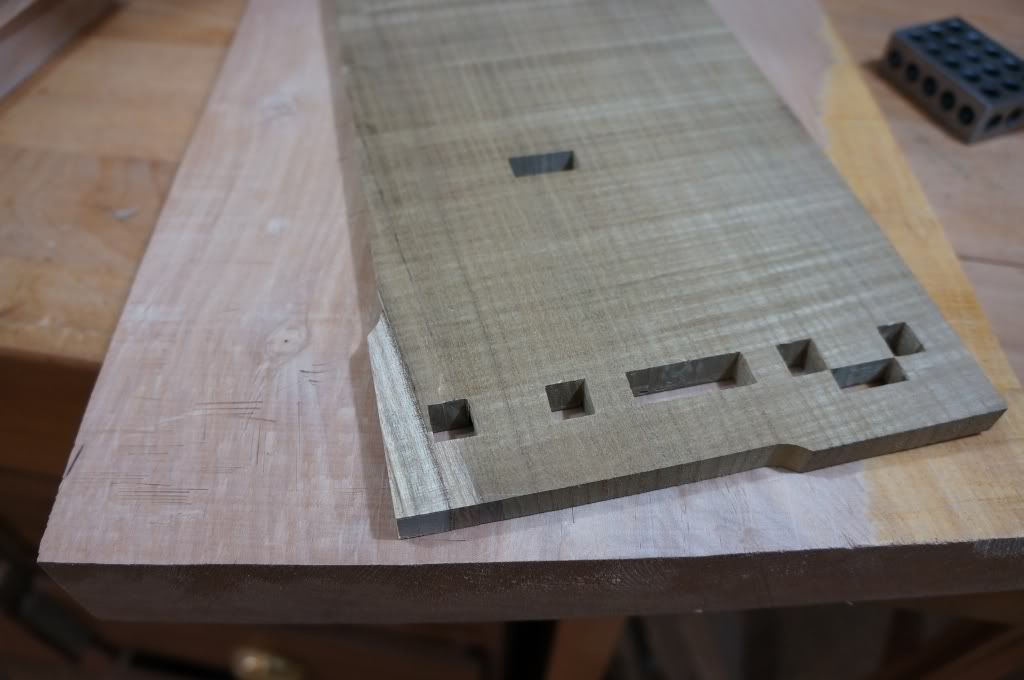
Well we are still plagued with back problems here at the Slow Woodworker offices. I have however made a bit of progress on a Japanese style toolbox that I am working on with a study group at The Carpentry Way. It's made of quilted catalpa (who knew that such a thing even existed!) with a Monterey cypress bottom. Both of which I milled up myself.

The handles are of black limba and the top will be elm. I know it sounds chaotic, but the black limba and the catalpa are a similar colour, and the bottom can't be seen with the lid on, so I am confident it will be fine.

After I rough cut everything I let it all settle, then trimmed it closer to finished dimensions and started making mortices. I even baked the cypress in the oven for a couple hours at 180 degrees or so as I have had trouble with sap bleeding in the past with this wood.

 Things were moving along nicely until I ran into an unanticipated violation of the "measure twice cut once" rule. As you can see, I cut the bottom piece too short! Needless to say it was not a happy discovery.

Anyways, I resawed another couple boards up and will let them settle for a while before working any further with them.

Meanwhile I found an old 6" jointer, made by Continental of Montreal. With my Continental bandsaw and my other 6" Continental jointer I may well have the largest collection of Continental equipment in the world! Don't think I have the largest collection of jointers in the world though, but I am up to six-ish! Unfortunately the previous owner had painted this one orange, but at least it came with the guard which my other one was missing.

Speaking of the other Continental jointer, I decided to tear that one down and rebuild it after I discovered that the outfeed table was out of parallel by about 20 thou. The teardown is complete, near bearings have arrived, I am having the main pieces media blasted as we speak. Not sure how I am going to resolve the parallelism problem, I am hoping a shim will do it, otherwise I may have to get the ways machined. Clearly a more expensive proposition than the jointer is worth!

Progress on the big Wadkin and White bandsaws has been slow. I am unable to do any work on them while my back is still "out". I did order and receive a set of Wright guides for the Wadkin, a blade for the White (that I hope will fit the Wadkin too!), a return spring for the Wadkin, and a VFD for each so they can be run off single phase. A friend suggested I cut a hole in the ceiling of my garage to fit one of these saws in. I am seriously considering doing that!