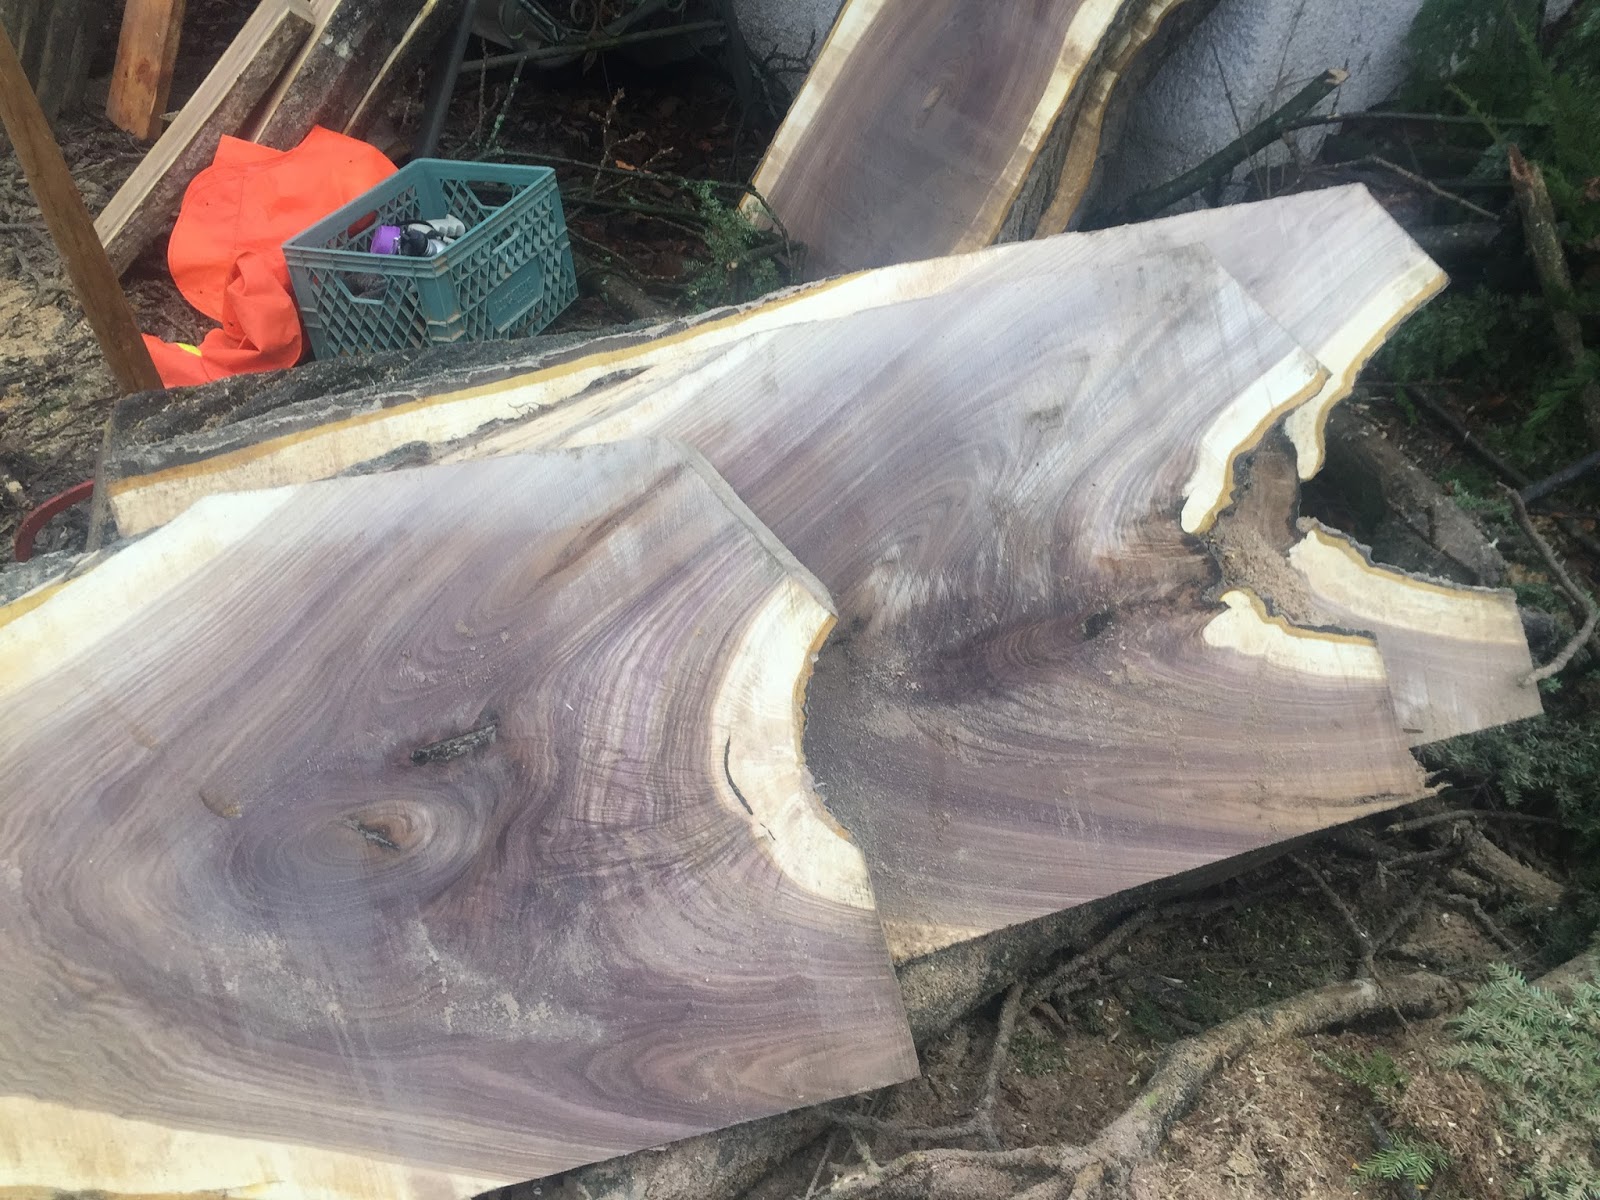
Monday, January 18, 2016

Cherry Table Progress, etc.

Got the last of my home made planes dialed in. Well, almost dialed in! Still a tweak or two to go but happy with the progress.

Also did a big clean up and re-org of the garage where I store a lot of my slabs. It was so full that even though I had several slabs dried and just sitting in the kiln for several months, I could not unload them since there was absolutely no place to put them.

These are some really wide elm slabs that I was able to pull out of the kiln finally. I had milled them width wise rather than length wise, to preserve the width. The largest one is over 3' wide. Unfortunately they are all a bit ripply, something I have not seen before and I think is due to the way I milled them. Will probably have to cut them in half anyways, so the last time I will do that kind of cutting!

Finger jointed boxes are a fun way to spend a bit of time now and again, gives me a bit of a break with a simple project that yields quick results. Also a great way to use up small pieces of special wood.

Here is some maple burl I cut up and will use for the boxes.

The first box I made, out of a piece of figured myrtle my son and I picked up some years ago driving up the coast of Oregon/California. I discovered some errors on this one so just cut the fingers off and did it again.

These boxes are of French Olive. A local somehow got hold of me a few years ago and asked if they could have some arbutus for a woodworking friend in France. I gave them a couple pieces and in return they brought home a chunk of olive. It was pretty crack riddled, but I was able to cut some pieces out of it for these boxes. Also one box is from Garry oak a buddy gave me from Vancouver Island. 

I wound up having to cut up another cherry slab for use in the base of the cherry table. I decided I wanted a couple of the pieces to be a bit larger than I was able to get from first few slabs I had cut up. I will be able to get a couple of nice 2x4" boards from these. And there is enough material that I can rip them to get rid of the grain run out, and they will wind up being mostly rift sawn so the grain will be similar on all four faces.
I will have to let these sit for a while to acclimatize before taking them down to final dimension.

Meanwhile I am ready to start on the crazy Japanese joint for the bottom piece.

Thursday, January 14, 2016

Easing Into 2016

Well I got one more of my planes dialed in. Still one last one to go for 2015 - I guess it is easy to get distracted here at the Slow Woodworker!

Still no milling to report. No logs showing up at the log dump. Talked to my contact at the city and he has no idea what is up.

No progress to report on the bentwood box either, other than to note that the crooked knife I have is apparently the wrong size. Later in 2016 for that project I guess.

Meanwhile I cut up several of my thicker cherry slabs to make pieces for the base of the cherry table I want to do.

Thanks to my Mini-Max bandsaw (one of the few modern tools I own) after not too much time the slabs looked like this.

In fact I had to cut up three slabs to get this many pieces, and I have one more slab for 'just in case'. Those cherry slabs have a lot of cracks coming in from the edges so there is a lot of waste. Good thing I know someone with a BBQ smoker who loves cherry wood scraps!

I want to make the base look something like this example that I found on the internet a few years ago. I have it filed under 'Clark', so thank you Mr or Ms Clark for the idea.

You can see the longest piece of the base is the one lying on the ground. It's almost as long as the top. Unfortunately my longest piece of thick cherry I want to use for the base is not long enough for the slabs I will be using for the top. What to do? Yes, that's right! Use a blind stubbed, housed, rabbetted, oblique scarf joint to join two pieces together to make a longer piece, how did you know that?

So I did a test using a couple pieces of slightly smaller cherry I had. Of course it did not go so well, it was too gappy, but at least I know what I did wrong so I should be good for the real one.

Anyway the start of the year seemed like a good time to head down a random rathole on another project. Finger jointed boxes it is! I was cruising the woodgears.ca site and admiring the crazy nice box joint fixture he made up and thought it would be a fun project. Then I realized I have a Hammond Glider sliding tablesaw that I have converted to Imperial units so I can precisely dial in increments of 1/256" or less than .004". Phht, who needs a box joint fixture when you have a tablesaw like that! And I have lots of small pieces of scrap that are perfect for small boxes.

I made up several small boxes, still working on getting the proportions to look good though. And as bonus I found this piece of scarp that looked like a fish skeleton on my table at one point!

Sunday, December 27, 2015

2015 - It's a Wrap

Well a few more days left but pretty much done. Feels like I got more accomplished in December than I did in the whole rest of the year!

Dad's yellow cedar box is done, just need to glue it up. I foolishly cut the original lid too short and so had to make a new one. The new lid is crabapple from a tree that was growing in our backyard when I was growing up.


I've had some Krenov style planes on the backburner for ages. Left to right in the photo.


I fixed up a jatoba smoothing plane which was the first one I made, ten years ago. The wedge never really fit quite right and it made the plane quite difficult to adjust. Once I figured out that was the problem and tweaked the fit properly it was quite a revelation! Of course I am rather embarrassed to admit it took me that long to get it right . . .

I have a slightly narrower cocoblo smoother with wedge issues as well, still working on fixing that one. I also put an insert in the bed a few years ago. This one cuts really well but is also fussy to adjust.

Also added some thickness to an ekki jointer plane that was a few years old, it was never stiff enough previously as I had cut the sides a touch too thin.

Also decided to make a new jointer plane at the same time as I was repairing the other one, but this one has the mouth set a bit further back. Had a piece of wood labeled Jarrah lying around, but I am pretty sure it is some kind of mesquite or similar wood. There were three holes in the piece so I put some ebony inlay to cover them up. Also added some beech strips just for fun. And also because I cut the centre piece too thin! This one was just glued up last night and is yet to be dialed in.

The last one is a small plane made of I think ipe. This one worked great right from the get go!

My hope for the last few days of the year is to get all these planes dialed in and working perfectly.

Looking ahead to 2016 I have decided to make a cherry slab table. I am drowning in cherry slabs so I am eyeing these four slabs which were all cut from the same flowering cherry tree. My son and I salvaged it from a lot in town in March 2008, so it is good and dry by now! I should be able to get two tabletops out of this, and I have an idea for the base that will hopefully showcase a bit of craftsmanship.
You can see very clearly the graft line at the top of the trunk, that is the right, on each piece, where the flowering stalks were grafted onto the regular trunk. I will definitely be using that in the table.

Finally, in 2016 I also hope to do a west coast native style bentwood box out of red or yellow cedar, or possibly even Monterey cypress.

Hoping for a productive 2016 in the shop!


Friday, December 18, 2015

Bowling

A friend of mine owns a very nice lathe and is an excellent turner. Him and I do a lot of chainsawing together, he uses the wood we salvage and turns magnificent bowls and platters and sushi trays and the like.

Sometimes though the wood is not so accommodating and during the turning various flaws are revealed. Previously he would reluctantly throw these bowls into the fireplace, rather than put his name of a piece of work he considered defective.

On a recent shop tour at his place, he gave me a bunch of these flawed bowls and said 'see if you can do anything with these'.  So I have been playing around with various patches to try and repair these flaws.

I quickly decided that there was no way to hide any repairs, so the best thing would be to try and turn them into a highlight, without conflicting with any interesting grain features the original bowl may have. 

This was the first one, a yellow cedar bowl with some sapwood on one edge. Unfortunately the sapwood contained some unsightly wormholes and dark staining. So I cut off the sapwood using my Hammond Glider tablesaw, keeping the cut parallel to the grain lines, and glued on a piece of red cedar with its grain aligned to that of the yellow cedar. Sorry no picture of the glued on red cedar.


Next up were a couple of maple crotch pieces with some interesting figure. The one on the right had a small crack right at the rim, which I was able to cut out with couple passes on the tablesaw. I then fitted a small piece of some kind of tropical red coloured wood into the cut. The other had an unattractive bark inclusion, which I removed by drilling out with a Forstner bit. I made a patch out of koa, which my friend then turned separately and fitted into the opening.


I did the Forstner bit trick on several other bowls. Holding the bowl securely is the key to preventing a misshapen hole, and drill in from the top so any tearout occurs on the back where it can be turned off more easily.


The one on the right I made up a maple burl and a koa patch.  My buddy can use either one, or make his own of course! The one on the left uses a triangular piece of that same red wood mentioned above. The triangular shaped cut out was substantially more challenging to get a tight fit with, as the faces of the two edges were not aligned well.

I cut off a big piece of this maple crotch bowl with wild grain. The patch is a light coloured cherry with  straight grain.
 This was a nice straight grain maple bowl. The grain was not perpendicular though, it was running through the bowl at 48 degrees. I cut the bowl and the cherry patch on the saw first, then trimmed them both on my jointer to 48 degrees.

This one is 'in process' still. My plan is to rip a one inch wide section out of the middle of the bowl. I have a nice piece of rift sawn brown oak that I will fit in. Unfortunately my saw is too small for the task, I will be borrowing a friend's saw in the new year to do this.

Kind of a fun change from my usual activities, and it is nice to have finished half a dozen in just a few days. I think that more than triples my 'projects finished this year' list!

Friday, December 11, 2015

Table Finished!


It all came together fairly quickly at the end. The top had cupped a tiny bit, so some judicious trimming of the support structure was required.

Also, the buttons I made to allow for expansion/contraction in the top piece had the grain aligned incorrectly. So I had to make some new ones. Not a big deal, but kind of embarrassing and I am glad I caught it in time. First buttons were of apricot shown on top, second buttons were of cherry below. You can see the grain lines run at 90 degrees between the two.

Have also made some good progress on the box for my father's ashes. Bad planning on my part was that I made the dovetails a bit too small to be able to work them readily with my chisels. So it required a lot of fussing, and they turned out OK but not great. The old growth yellow cedar was surprisingly susceptible to chipping. Still have to put in some grooves for the top and bottom, then glue it all up. Close to done. Hope to have a little family ceremony in the late spring, so still lots of time.

Got out for the first milling of the autumn season. Initially thought it was walnut, but subsequent investigation shows it is most likely butternut. Not quite as colourful nor as dense as walnut, but still a nice wood on its own. Mostly shorter chunks in the 3-4 foot long range. Over two days we milled probably 30 slabs, including several quite nice crotch pieces with some nice figure. On a private lot in New Westminster, another local bungalow going down for a McMansion.


Also got out to the beach with a friend to do some 'clean up' on some slabs I had milled in years past. My storage area is now so full that I can't really afford to store any slabs that are less than perfect. So we hauled a bunch back to the beach and cut them up and saved just the good sections. It was a really really nice day, but a bit frosty!

Monday, November 30, 2015

Table Update

Stunning progress to report on the oak slab table. It looks like it will possibly be finished in the next few days! It has been quite a while since I actually finished a project, so I am quite looking forward to it!

I completed the mortise and tenon joinery fairly quickly, the fit came together surprisingly well. The error I made in cutting the mortises a bit too long turned out to not be a big deal, a 1/4" dowel will fill the extra space without showing.

First photo shows the table test assembled, no glue, no finish, and the legs have not been relieved yet. Could not resist throwing it together to see how it looked and fitted!


Detail of one corner. A very acceptable fit. The slightly brown tone of the skirt clashes with the slightly red tone of the leg, but the difference is barely noticeable later on with the finish applied.

Four coats of the Enduro Var urthane finish applied. I was more diligent about sanding between coats and that really helped with the smoothness of the finish. 

There is a slight taper applied to the inside faces of the legs, it's not so obvious in the photo above but it does help to lighten the underside of the table up a bit. The slab is not very thick, just over one inch, so it is better that the legs and skirt be a bit lighter.

Saturday, November 21, 2015

Benched!

Finally getting back to some work in the shop, although I have also been spending some time in the wood vault cleaning up some of my slabs and cutting the crappy sections out of others in an effort to free up storage space. Storage space for more slabs of course!

I have decided to focus on finishing up a bench made of oak that I started ages ago. I have a couple other projects that are also partially done, but this is one that I think I can complete  relatively quickly (for me!). I intend to use it to replace my chair while I am sitting at my desk, I want to be able to kneel on it while I am typing/surfing/etc. I am hoping it will improve my flexibility and alleviate some related symptoms.

The top is a slab that I finished with several coats of Enduro Var water based finish months and months ago. It was pretty easy to apply and also not stinky at all. It darkened the wood a bit which was not too serious, but the foam brush which was the recommended application method left small ridges. They are quite small, probably not noticeable by anyone but me, but will  have to be resolved before I apply it to the legs and skirt.

I had also cut out the material for the legs and the skirts ages ago. I took care to cut out the legs such that I have all four sides with vertical rift sawn grain. I think they turned out quite well.

For the skirts I wanted to use some oak that had a bolder grain pattern. Unfortunately one of the longer pieces warped quite badly when I cut it out of a larger blank. I really liked the grain so I was loath to discard it.

I sat on that problem for months, and finally decided to resaw the piece into a couple of veneers and glue them to a nice straight piece of mahogany. That actually seemed to work pretty well, although my gluing and clamping techniques could stand a bit of improvement!

Here is a rough idea of what the table will look like upside down.

Side note -The oak for the skirts was from a tree a couple miles from my house. It was on a boulevard in front of a 1950s-ish 3 story walk up apartment building which were once common here in Vancouver. The tree had been blown over in a storm and the city crew had left a nice piece of the trunk there after cutting up the branches for firewood. It was one of the rare logs that I milled on the street rather than at the log dump our in the sticks somewhere. It took me several hours and as I was almost done a guy in a tatty white Jaguar who looked like a pimp with a very suspect looking woman in the passenger seat stopped and proceeded to harangue me for chainsawing in front of his suite for more or less the whole morning. Despite his scruffy demeanor, I felt he was probably correct so I have avoided milling in front of houses/apartments since that time. I did get some beautiful slabs from that log, but unfortunately they cracked terribly as they dried and I was left with just a few bolts of usable material. That is another reason I was so keen to save the little bit of the material I did have. It's nice to mill your own wood, you get lots of stories to go along with it!

Next I mortised the four legs freehand on my horizontal mortiser. I am starting to think that a nice X-Y table might be a good addition to the shop. I find freehand milling just a bit too grabby and hence stressful for my liking.

Next will be to finish the tenons and then I may do a bit of shaping on the legs just so the thing doesn't look so darn 'blocky'.


In the setback department, in addition to the warped piece mentioned above, I have discovered that I cut all the mortises a bit long. As I have already roughed out the tenons, I will not be able to compensate by lengthening them, so I have decided to plug the tenons at one end. Fortunately the amount is fairly small and 1/4" dowels look like they will do the trick. Just pure carelessness on my part, dropped my concentration for a moment and BOOM!